The Christmas Truce Truth & Myth

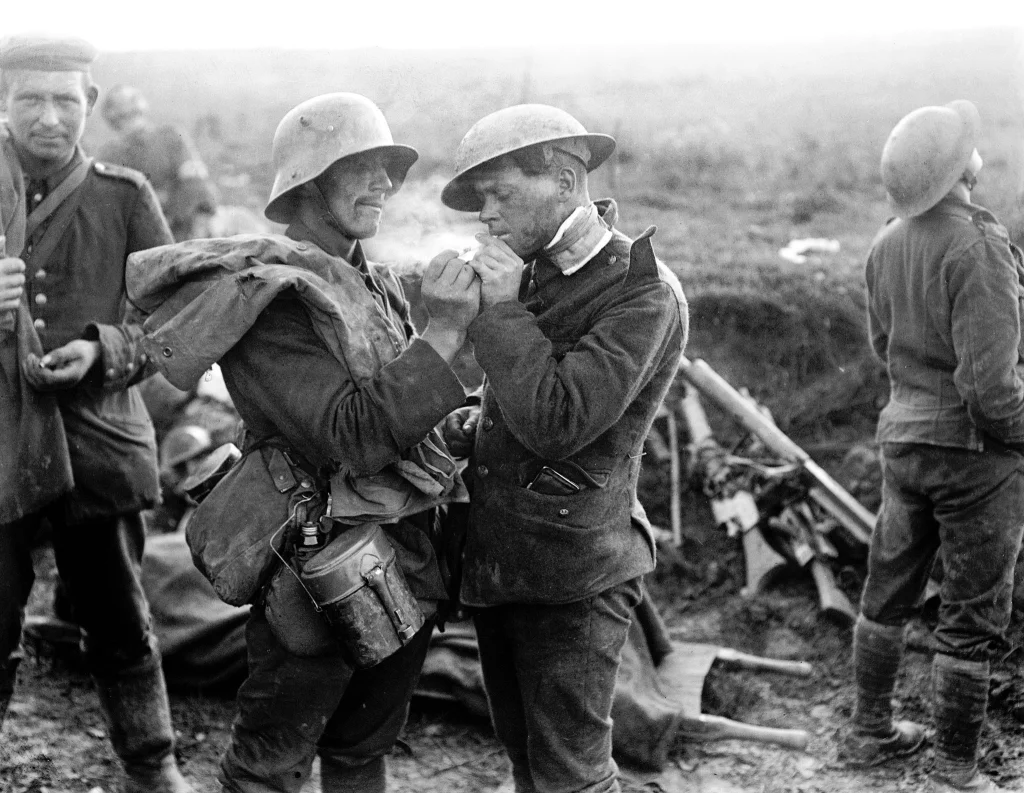
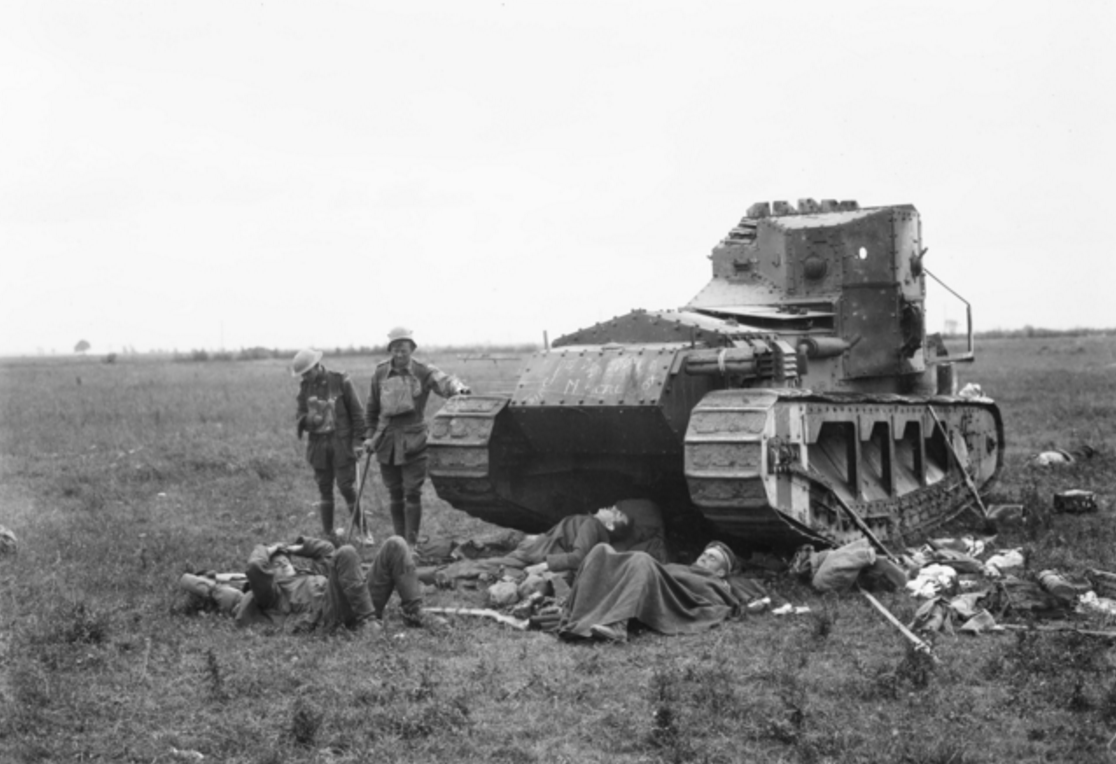
This image is widely portrayed as a British and German soldier exchanging cigarettes on Christmas Day of 1914 during the Truce. The reality? The caption on the IWM site states, Battle of Epehy. British wounded and German prisoner sharing a cigarette at an advanced dressing station near Epehy, 18 September 1918. Note captured German Maxim 08/15 (Spandau) light machine guns in the background. IWM Ref No Q 11538

On 14 December an attack was launched by the 8th Brigade at Wytschaete; this failed with heavy casualties. On 18 December 1914, another attack was launched by the 22nd Brigade at La Boutillerie; this also failed with heavy casualties. It’s important to note this because this will have a bearing on what I cover later on in this blog.


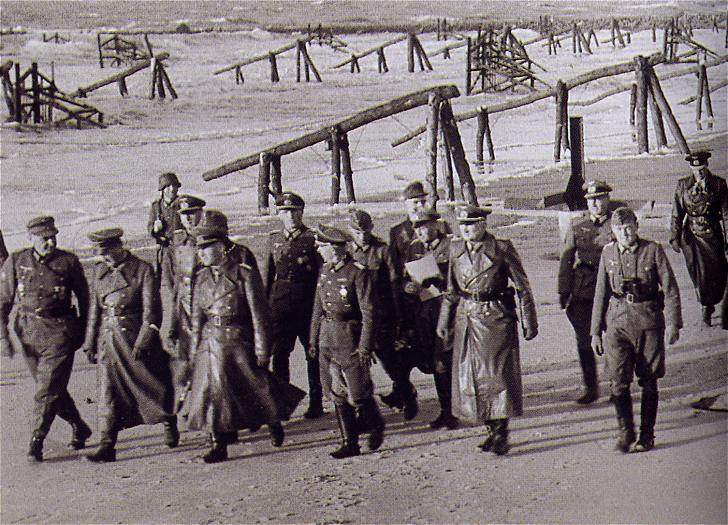
The famous wartime cartoonist Bruce Bairnsfather recounted an episode that has been leapt on by others and it became one of the focal points for many of the centenary events in held in 2014. This included the abomination that is now the football memorial that stands close to St Yvon and on the edge of Ploegsteert Wood, known as Plugstreet Wood to the British soldiers who served there.

He stated:

Around noon, a football match was suggested. Someone had evidently received a deflated football as a Christmas present.


This mention of football came forty years after the event when he was interviewed in 1954 for a television piece. And, according to Lieutenant Kurt Zehmisch, two English soldiers brought a football to the German trenches. The first account is false and the writings of Lt Zehmisch have been misinterpreted. I will come onto those later.

This is possibly the most ill-used image in relation to the Christmas Truce and football. It gets labelled time and time again that this shows British and German troops playing football on Christmas Day 1914. The reality? The caption on the IWM site states, Officers and men of 26th Divisional Ammunition Train (Army Service Corps) playing football in Salonika, Christmas 1915. IWM Ref No Q 31576


Also, in an online article in The Telegraph, dated 11 December 2014, the title stated:

‘Belgian monument unveiled to mark “humanityof British and German soldiers who put down their arms and left their trenches to play football during an unofficial truce on Christmas Day 1914’.


These headlines and articles were printed all over the world and there is that romanitised notion that men got out of their trenches and all played a jolly old game of football in no-man’s-land when the guns fell silent. Except that football between the British and Germans never took place at St Yvon and so the memorial to it is citing a piece of history that did not happen there.

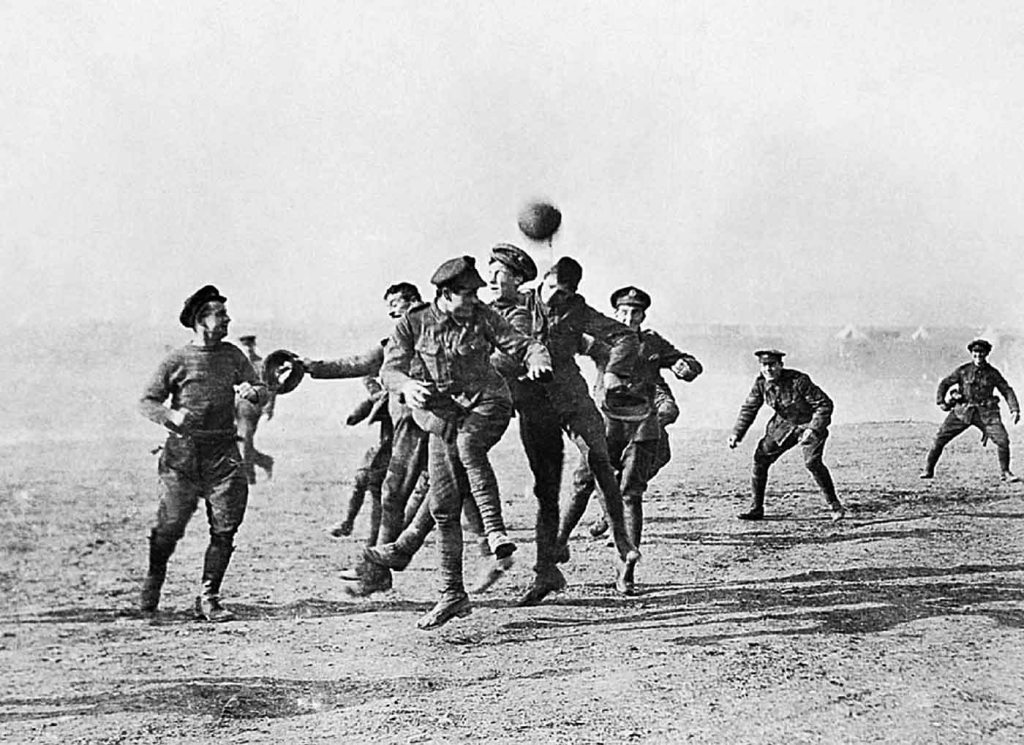
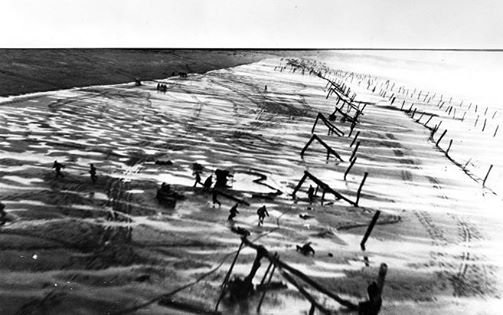
With regards to images of the Christmas Truce you have to be very careful. There are accurate images of the event, but none that portray men playing football and many of them are duff history because they come from another time. A big clue to all of them is if you see both sides wearing helmets then they are not Christmas Truce because helmets were not widely issued to both sides until 1916.

The Christmas Truce that occurred on 25 December 1914 is fact and there are numerous accounts from the time that confirm this. But what is not as easy to confirm is the notion that both sides played football against each other. Certainly, many of the veterans who were there that day refute this and there are few primary sources that mention this occurring.

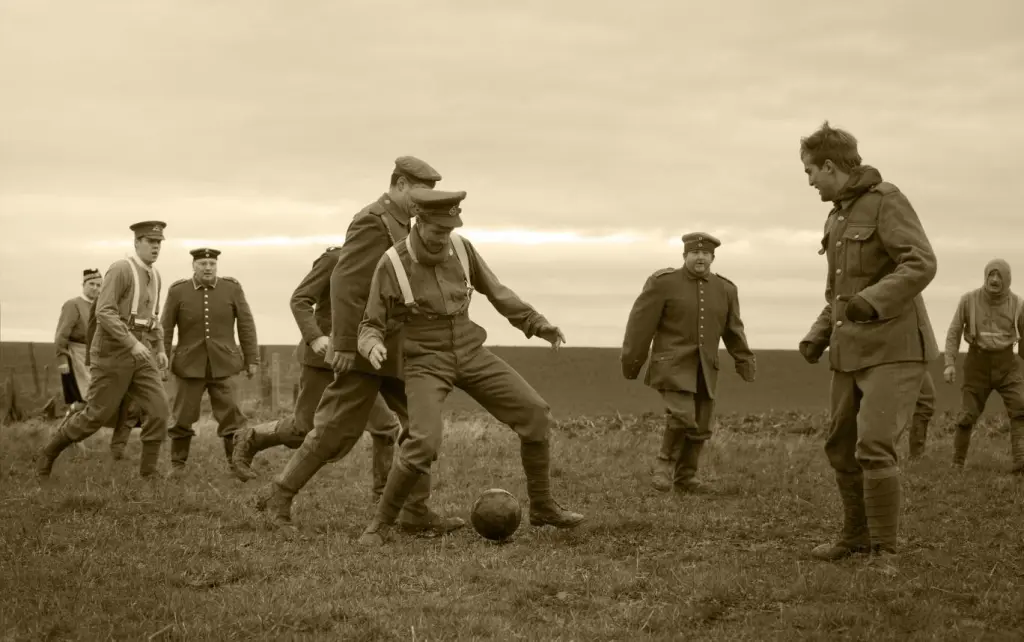
Another duff history image which people think comes from the Christmas Truce of 1914. The reality is this image comes from a football match which was played at St Yvon in 2014.

Secondly, this has not been helped because we also have accounts from veterans recorded later on, such as that made by Ernie Williams in 1983, who had served with the 1/6th Cheshire Regiment, where he states:


The ball appeared from somewhere, I don’t know where, but it came from their side—it wasn’t from our side that the ball came. They made up some goals and one fellow went in goal and then it was just a general kick about. I should think there were about a couple of hundred taking part. I had a go at the ball. I was pretty good then, at 19. Everybody seemed to be enjoying themselves. There was no sort of illwill between us. There was no referee, and no score, no tally at all. It was simply a melee—nothing like the soccer you see on television. The boots we wore were a menace—those great big boots we had on—and in those days the balls were made of leather and they soon got very soggy.


This is now widely considered by experts to be a fabrication of the truth where Ernie Williams was almost prompted into saying what he felt the interviewer, Malcolm Brown, wanted to hear. It is reputed that Malcolm Brown himself did not believe Ernie’s tale. And certainly, when he is trying to intimate that football was played by hundreds of soldiers on both sides, surely if that were so, there would have been accounts from the time? So sadly, there is the misconception that all over the line this occurred.


The accounts and reports about football have to be carefully studied because virtually all of them are false mainly because they came out a good while after the event (e.g. in 1916 or even later on as with the case of Ernie Williams). Another example of how things get misinterpreted is this account, again in the same sector as where Bairnsfather served. Henry Williamson wrote about the Christmas Truce several times. He mentions football once in a fictional novel, A Fox Under My Cloak, published in 1955:

… a football was kicked into the air, and several men ran after it. The upshot was a match proposed between the two armies, to be held in a field between the German lines.

The watchword here is ‘proposed’. And yet the account by Henry Williams is also taken to be an accurate account of football being played by both sides.

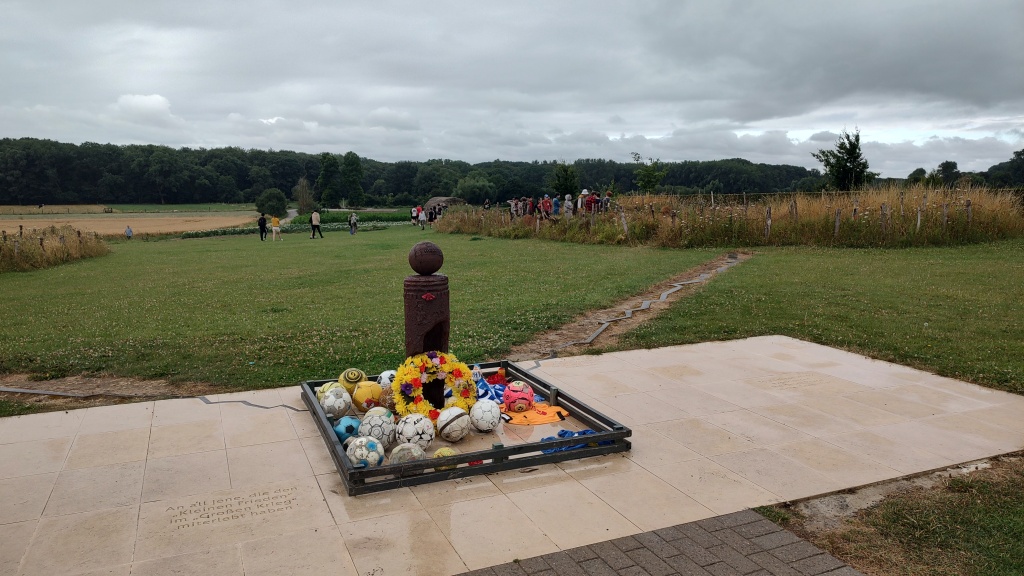
The duff history UEFA memorial to football at Prowse Point near Ploegsteert Wood. Everything on this site is fake and the memorial, now given the nickname the ‘Rusty Bollard’ commemorates an event that did not happen here.

The other way that accounts come is from men serving in regiments that if you actually looked at where they were, they were not in the same place or can be discounted because of what others said at the time.


This is what Malcolm Brown and Shirley Seaton had to say about it in their excellent book Christmas Truce, which was first published in 1984 when we still had veterans who had witnessed the truce to speak to. I would urge anyone who is interested in reading more about the truth behind the Christmas Truce to read this book:


To many people it has come to be accepted that the central feature of the Christmas Truce was a game, or possibly games, of football in which British and Germans took part. Indeed, to some, the whole event is not so much ‘the truce’ as ‘the football match’. It is, of course, an attractive idea, carrying as it does not only the heart-warming thought of enemies at friendly play, but also the appealing if politically niave implication that nations would be far better employed in settling their differences in the fields of sport rather than on the field of war. Yet there are those, including some veterans of 1914, who doubt if any football match took place at all.

And this is why we have to state that Bairnsfather’s mentioning of football in the TV interview is not true.

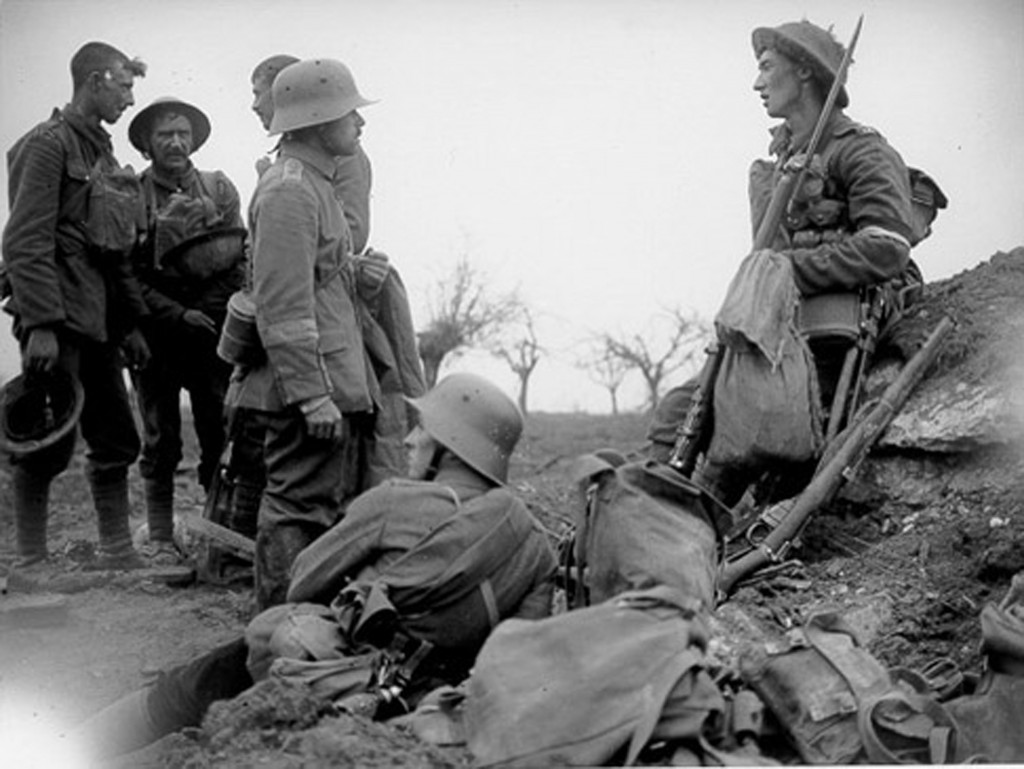
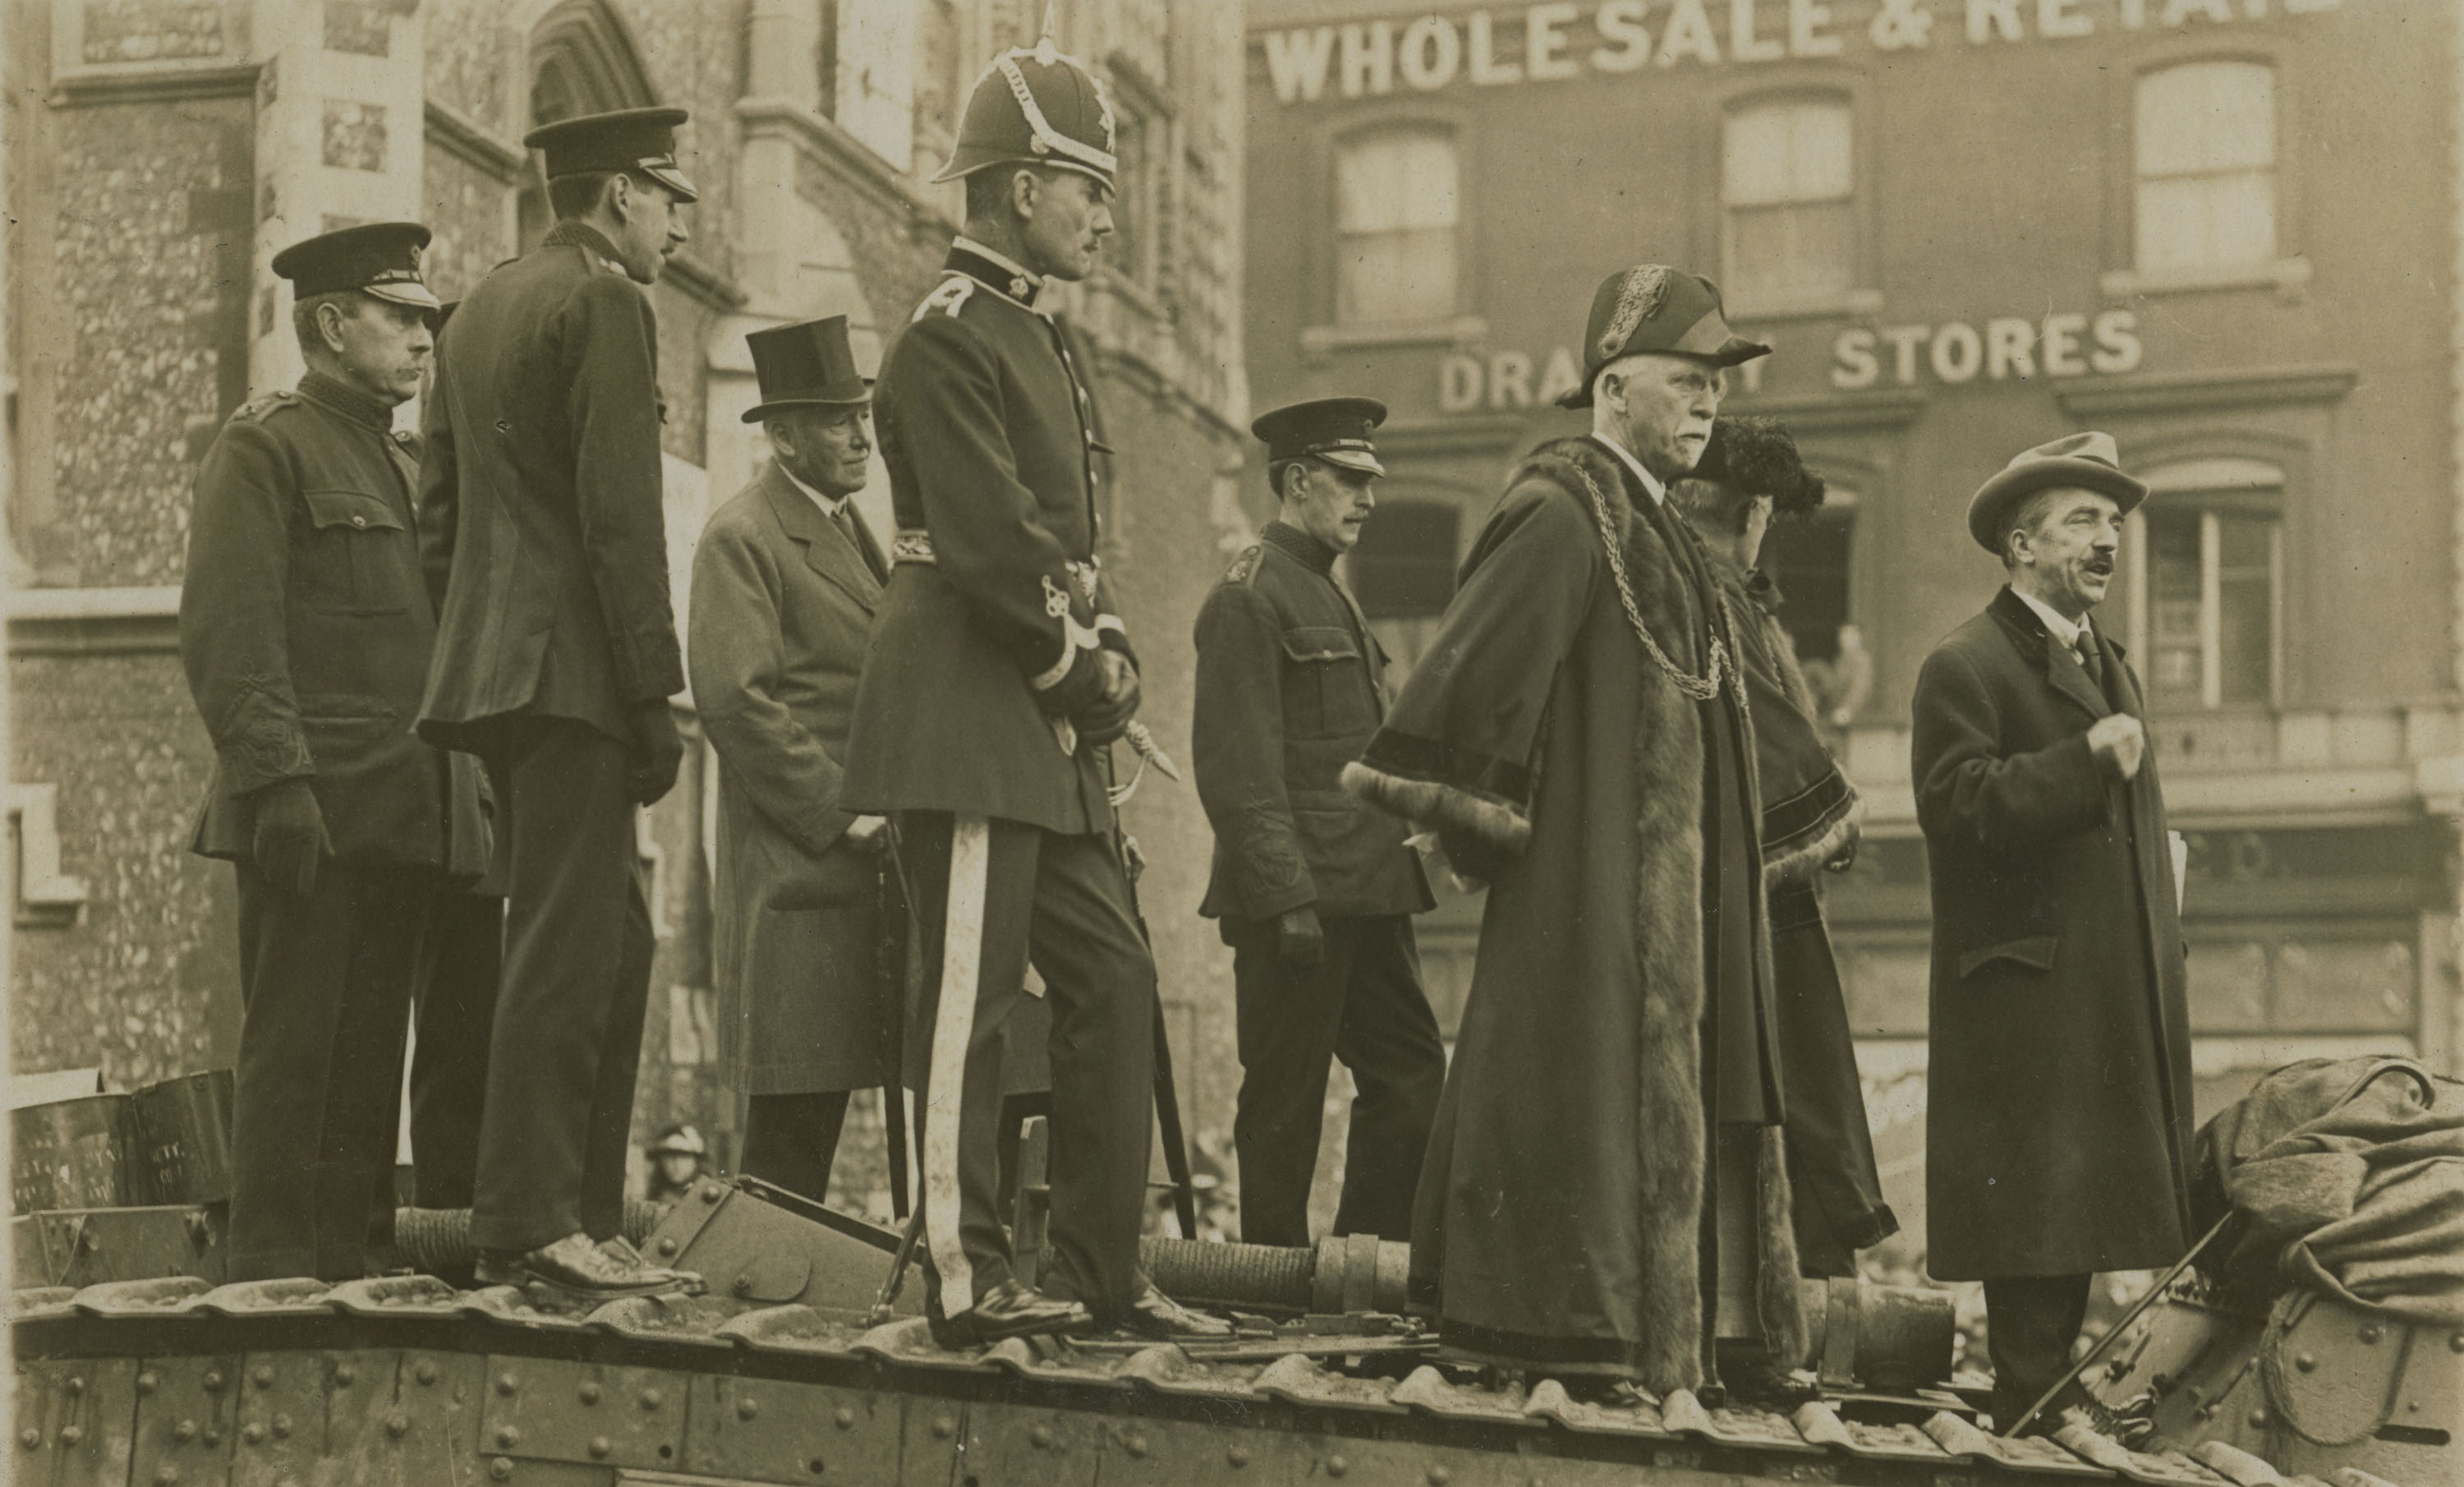
Another favourite surrounding the duff history images for the Christmas Truce of 1914. The reality? The caption on the IWM site states, Battle of Pilckem Ridge. German prisoners waiting to be interrogated. Pilckem, 31 July 1917. Note a Gibraltar cuff-title worn by a German POW. The British soldiers on the right are probably servicemen of the Irish Guards. IWM Ref No Q 5724


Captain Robert Hamilton noted that ‘A’ Company of the 1st Battalion Warwickshires would have played the Saxons but were relieved. CSM George Beck wrote in his diary that the Germans shouted across a challenge to play football on Christmas Eve, but then there is no mention of a game being played. What we can also confirm is that ‘C’ Company of 1/RWK played a game among themselves. This is now generally agreed that this is the game mentioned by Lt Zehmisch of IR134, whose account from his diary actually says: ‘

The English brought a soccer ball from the trenches, and pretty soon a lively game ensued.

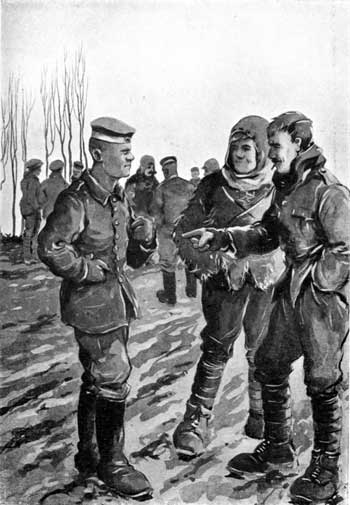
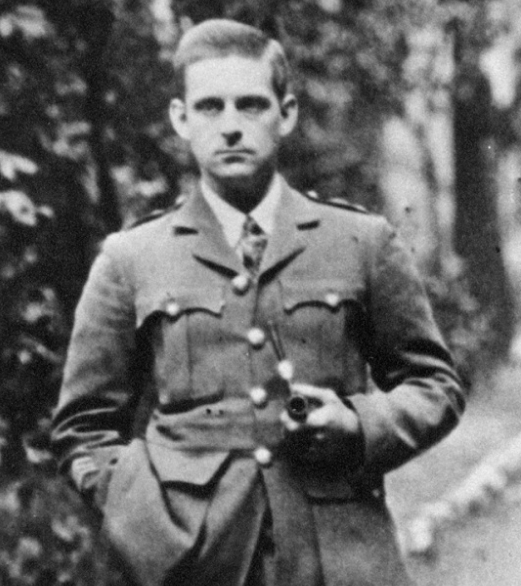
The famous image of Bairnsfather meeting a German soldier in no-man’s land on Christmas Day of 1914.

Bairnsfather details everything about the day in Bullets and Billets, and the main theme he concentrates on when he sees the Germans in no-man’s-land is this meeting:

I spotted a German officer, some sort of lieutenant I should think, and being a bit of a collector, I intimated to him that I had taken a fancy to some of his buttons. We both then said things to each other which neither understood, and agreed to do a swap. I brought out my wire clippers and, with a few deft snips, removed a couple of his buttons and put them in my pocket. I then gave him two of mine in exchange.

So, if you visit the UEFA Memorial at Prowse Point, know that you are visiting a duff history site. Despite being told that no football was played there between both sides UEFA went ahead and had the memorial put in. So, sadly, it commemorates an event that didn’t take place, the trenches are nowhere near the front line and the bunker you see was moved there. It’s all fake.

The reality is that, of the thousands of men who may have taken part in the truce, only around twenty to thirty men may have played football with the Germans. We do have accounts from German soldiers, written soon after the truce, to state that they played against their British opponents, but it is one specific incident that only occurred in one specific part of the Western Front.


Two German soldiers, one called Johannes Niemann, both served in IR133 and Niemann recounts his experiences while serving in trenches on a frozen meadow at Frelinghien:


Then a Scot produced a football … a regular game of football began, with caps laid on the ground as goalposts. The frozen meadow was ideal [to play on]. One of us had a camera with us. Quickly the two sides gathered together in a group, all neatly lined up with the football in the middle.… The game ended 3:2 to Fritz.

The second account comes from a letter discovered more recently where the second soldier from IR133 wrote to his mother and mentioned, ‘playing ball with the English’ so this helps to confirm the account by Johannes Niemann and the position mentioned by Niemann correlates to his regiment playing against the 2nd Battalion Argyll and Sutherland Highlanders. However, we do not have anything concrete from the 2nd A&SH to confirm they played against the Germans.


Now that is perhaps enough to confirm football being played on Christmas Day, but there is one more story that can be corroborated from the thousands of them out there, which we will now look at, and it involves the 1st Battalion, Norfolk Regiment. On Christmas Eve, the weather changed to a hard frost. In the evening, the Germans were seen to place Christmas trees with candles on their parapets and they are heard to be singing carols. It was here that something amazing would happen on Christmas Day.

Herbert Reeve was in the line for the truce but does not make mention of what others would witness during this time:

And so, came Christmas 1914. We received Princess Mary’s Christmas gift of pipe, tobacco and cigarettes, and I still have this in my possession, as issued. Then the fraternisation took place on Christmas Eve. My Company were in reserve line at the time.


It is little wonder when you look at that narrative that the reports of the Germans meeting the Norfolks was reported in a very official way by officers who reported back to GHQ. Of these reports, there are three in the war diary. The first comes from Lieutenant George Philip Burlton:


On December 25th I was in command of the right-hand fire trench of the Norfolk Regiment’s position. During the morning I noticed groups of the enemy and British Troops belonging to units if the 4th Division meeting half way between their trenches. At about 1 p.m., one of the enemy left the trench opposite our own and came unarmed toward us. I sent a Corporal to meet him half way. After a time more Germans crossed towards us and I allowed an equal number of my men to meet them. Seeing a German officer also out in the open I went to meet him myself. At about 2.30 p.m. all our men under my command were back in the trench.


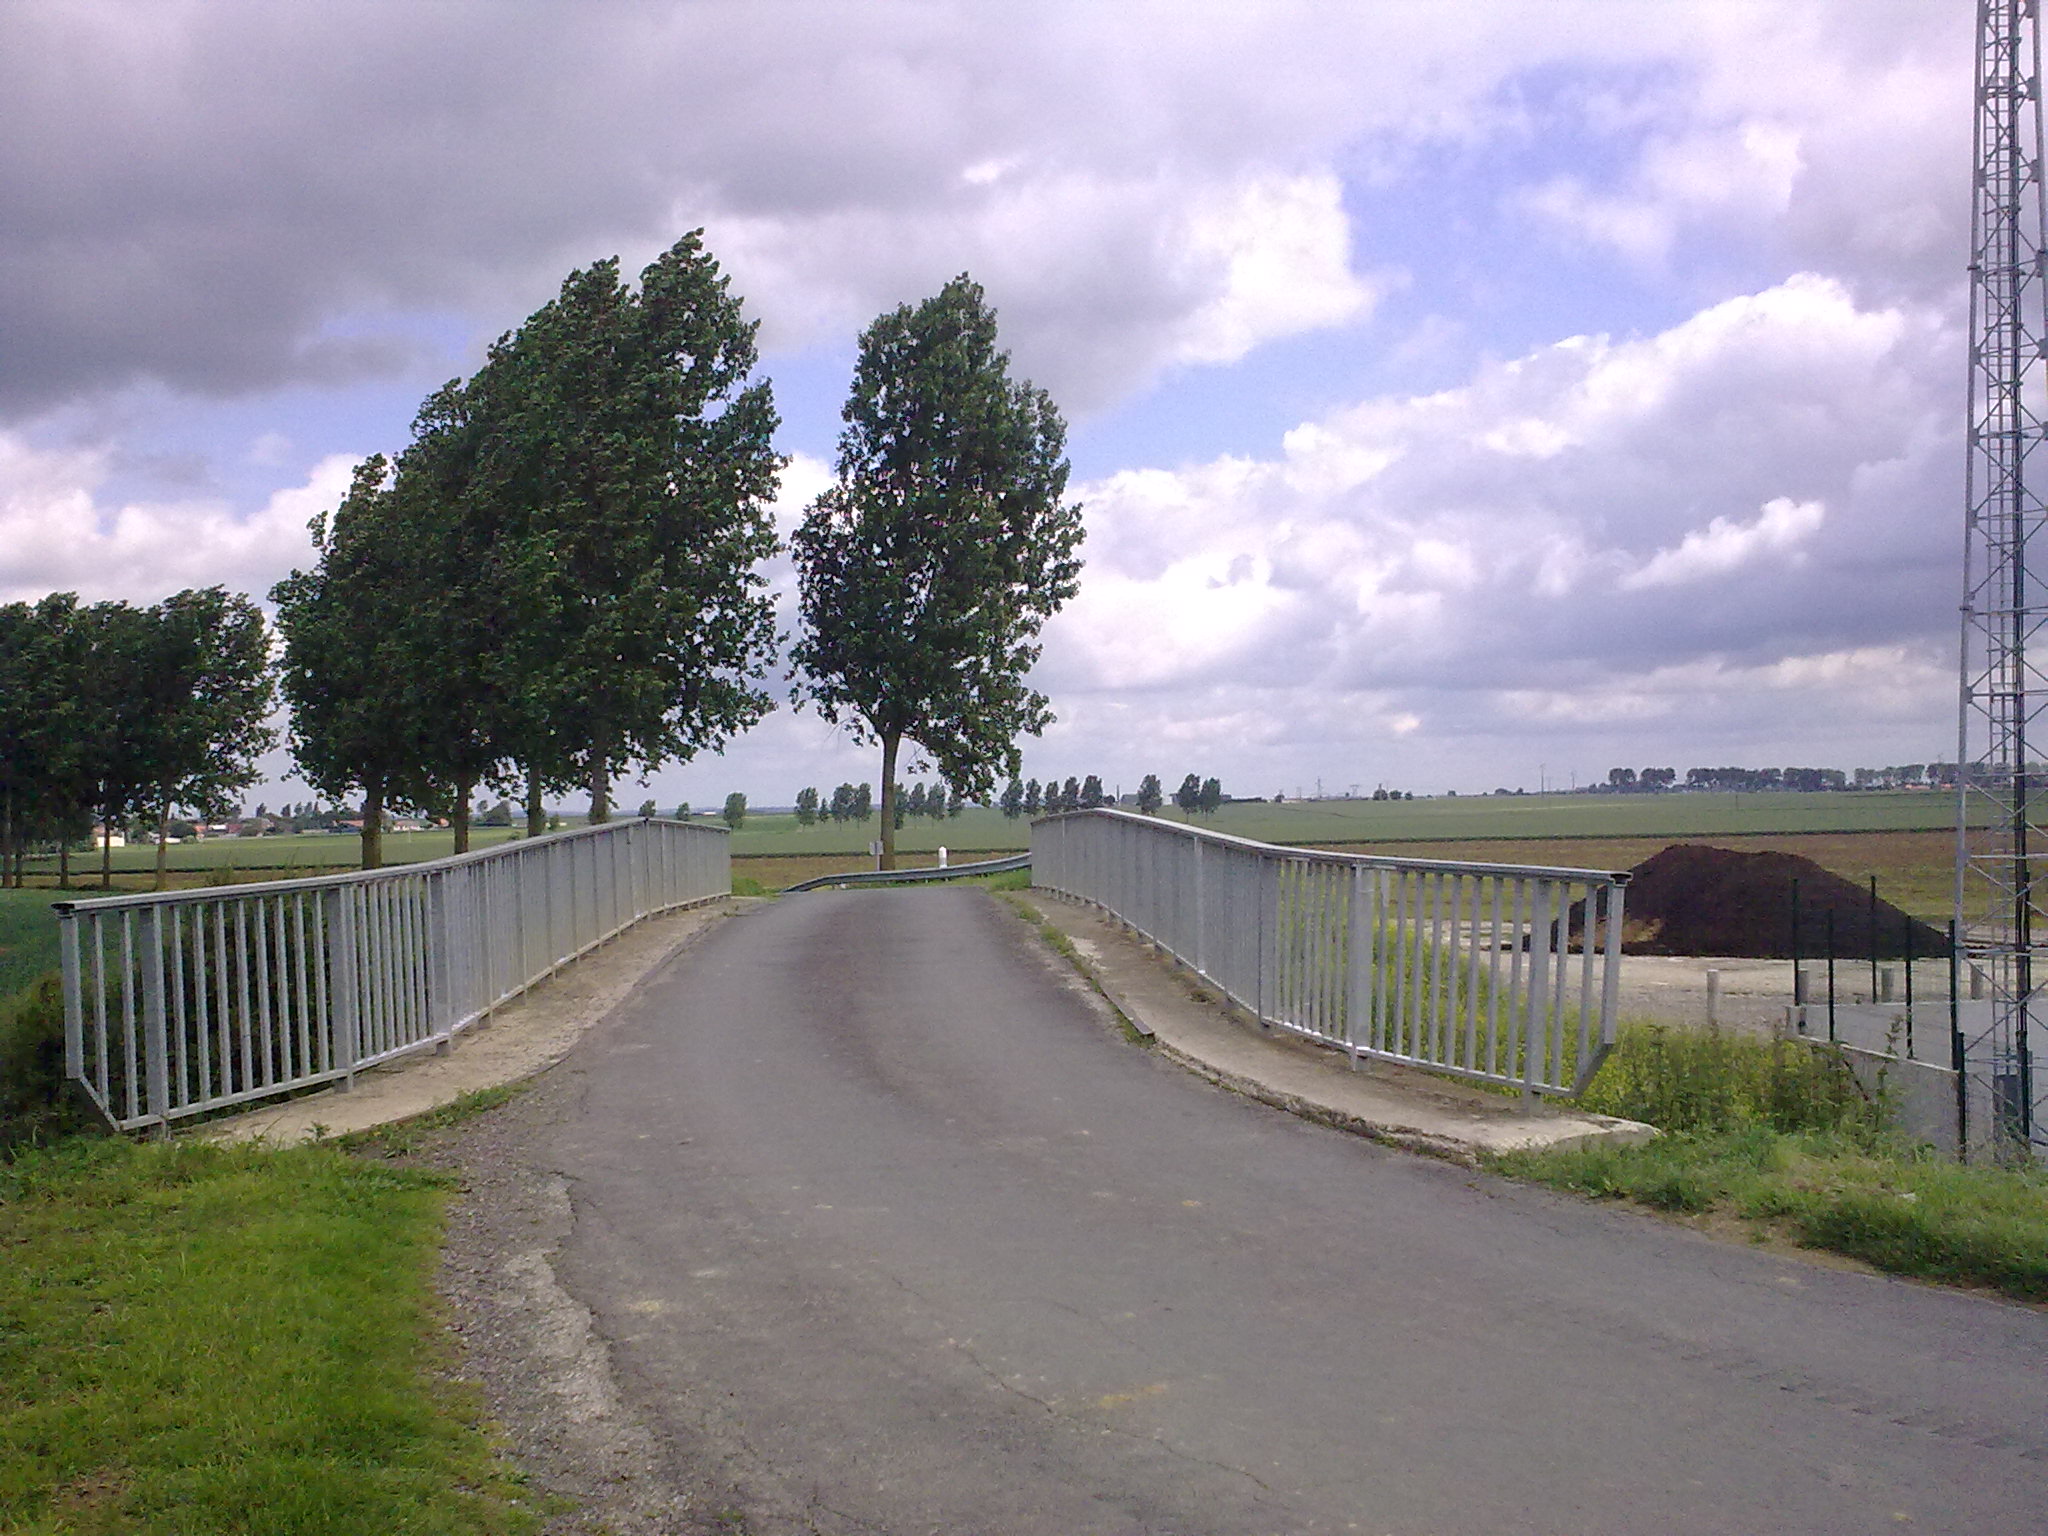
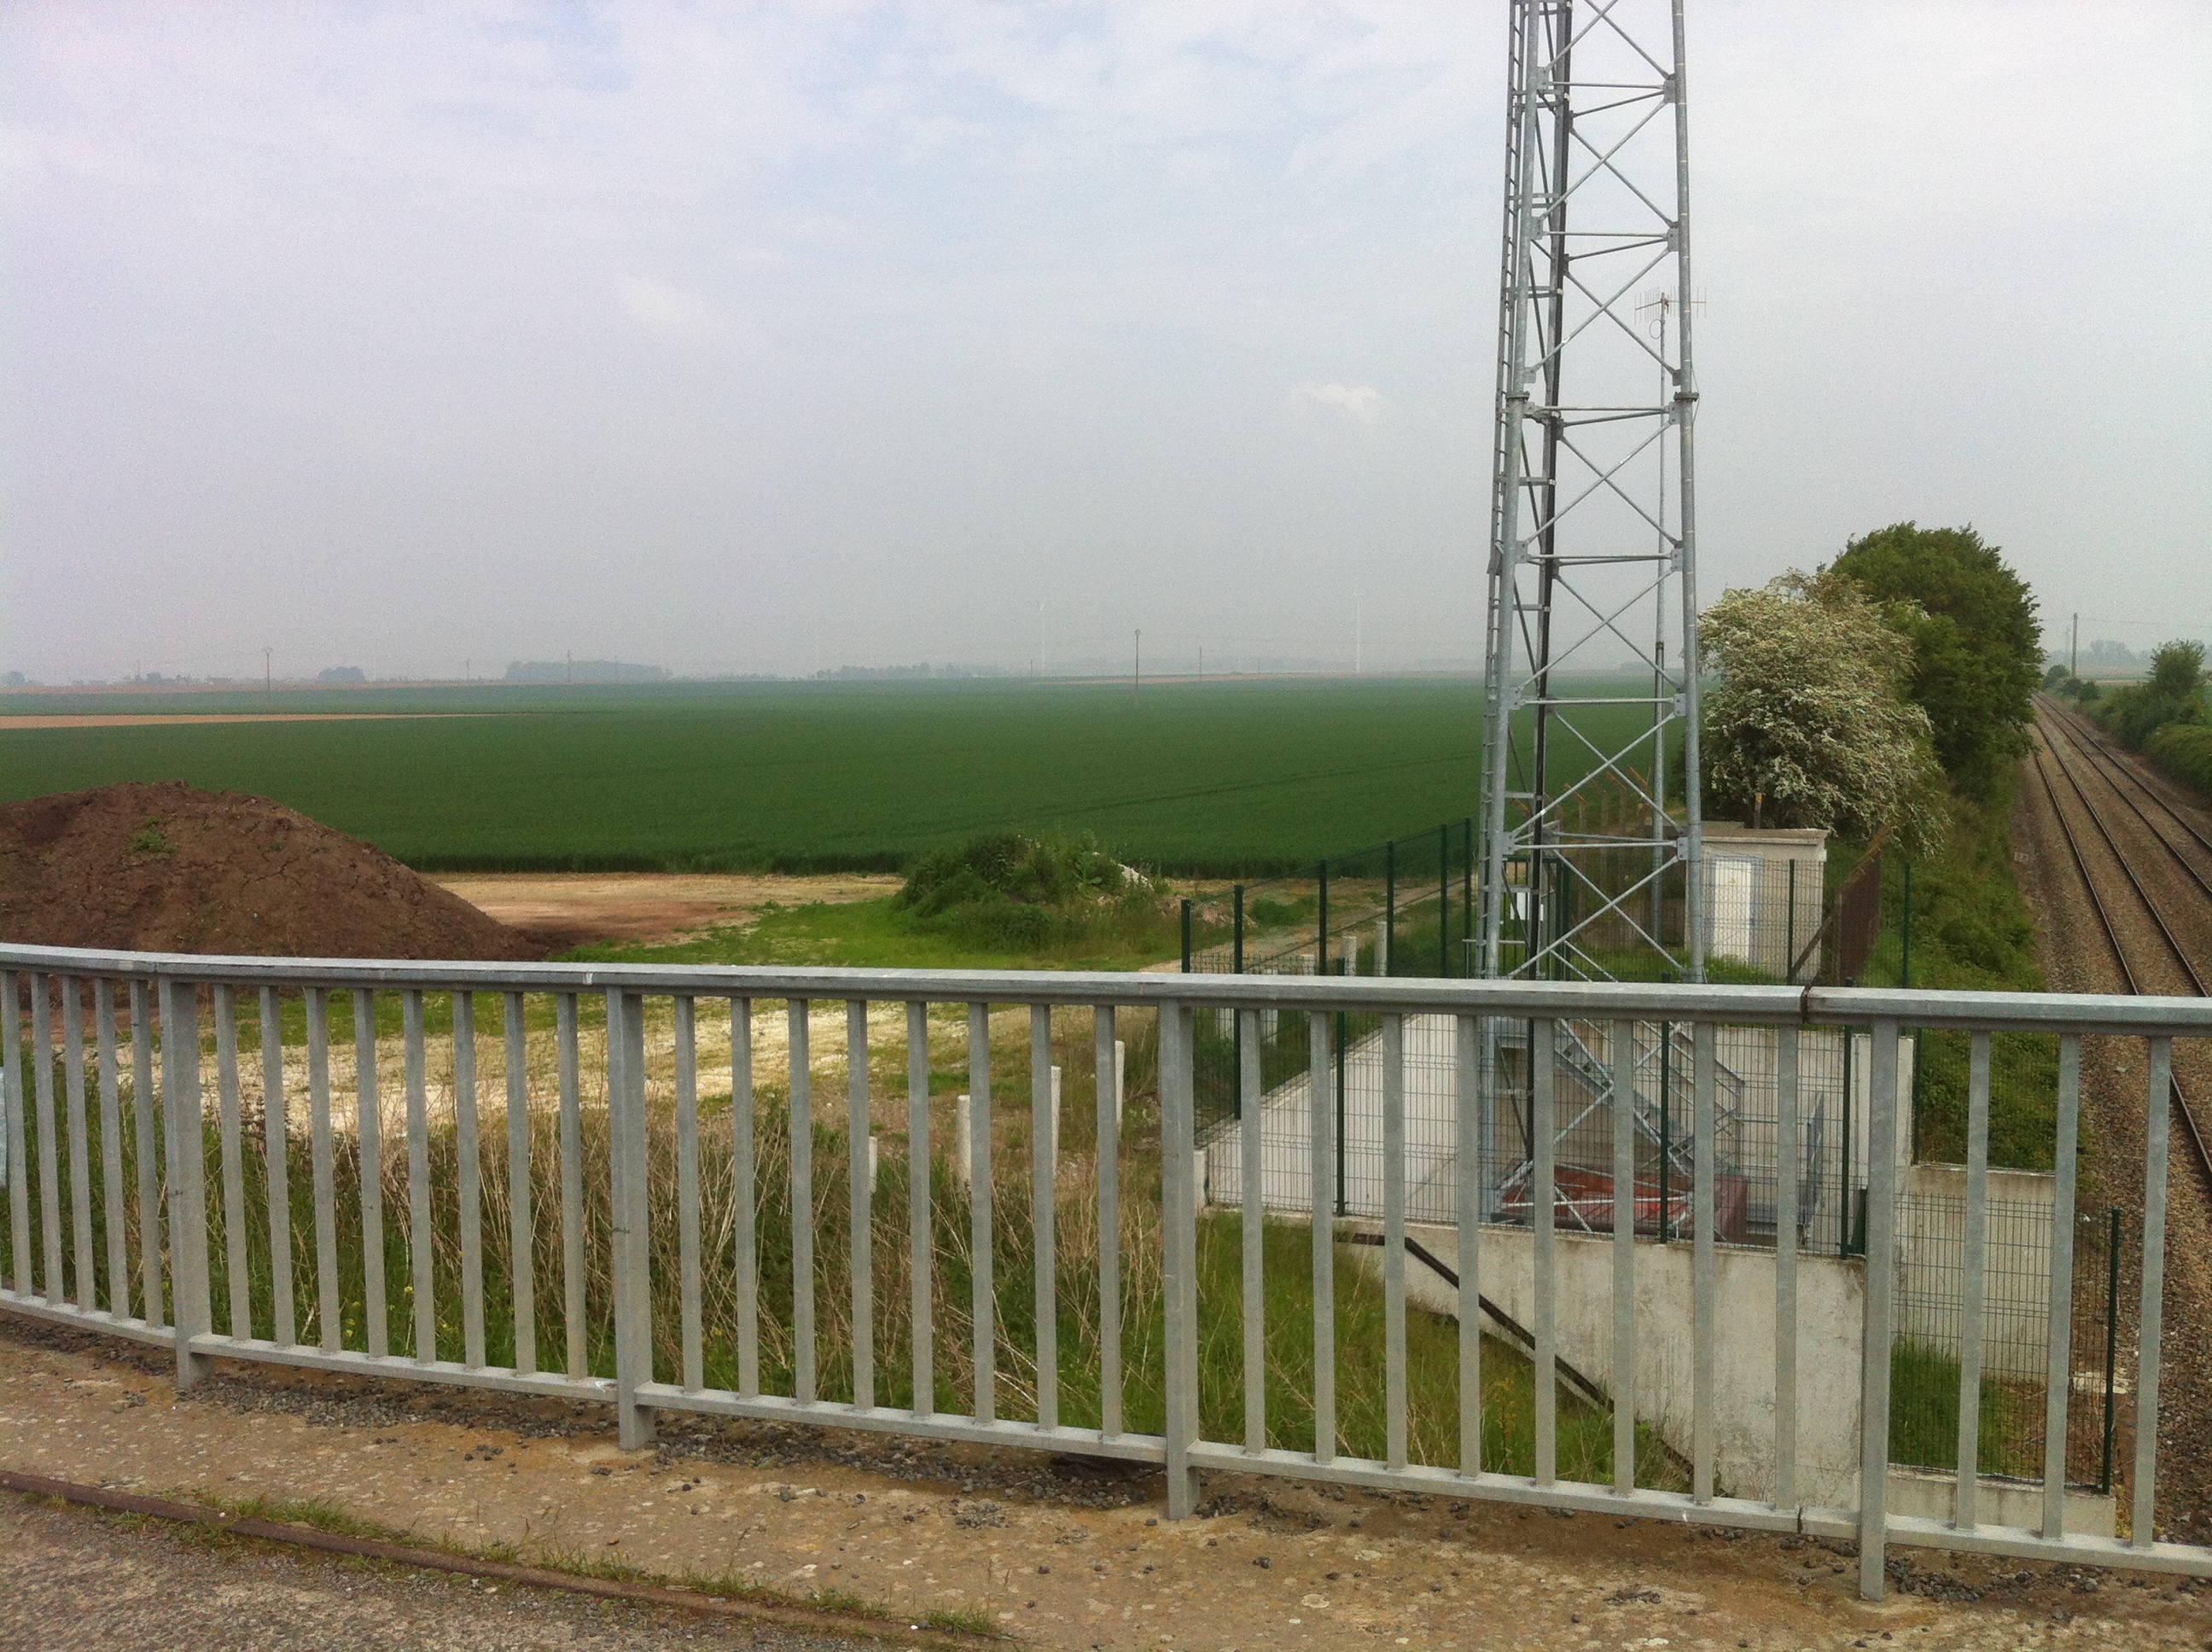
But these reports aside, which make no mention of football, over a Twitter discussion about the 1st Battalion Norfolk Regiment and their involvement in the truce, it became very apparent that this battalion did play football in no-man’s land between the lines just to the north of the Wulverghem–Messines road.


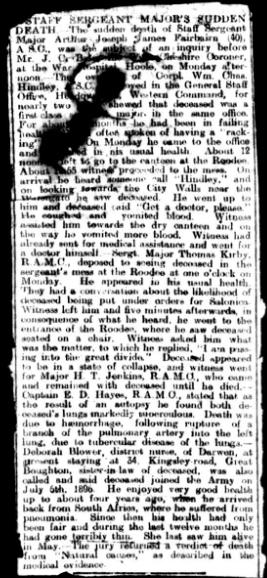
In a newspaper cutting detailing the experiences of a soldier called Albert Wyatt, who came from Thetford, and who was in the trenches with the 1st Norfolks on 25 December.

Albert Wyatt’s account of his experiences in no man’s land printed in the Thetford Times soon after the event had occurred.

Football in the Firing Lines

Thetford Corporal Among the Players


The strange Christmas scenes which occurred in the British and German firing lines are described in a letter written by Corporal A. Wyatt to his parents a short while ago. He regards it as the most historic day ever spent on the battlefield. He says that when ‘A’ Company, 1st Norfolks to which he belongs arrived in the trenches on the 24th December they found everything quiet. There was no rifle firing. They had been in the trenches a short time when they heard someone singing Christmas hymns. Then all at once there were shouts of ‘Three cheers for the English’. To their surprise the voice came from the German trenches. ‘Then our men and the Germans,’ Corporal Wyatt proceeds, ‘started singing hymns together. The same thing carried on nearly all night and there was a sharp frost to make things look better. On Christmas morning it was very thick and we could not see far in front of us till about midday. Then we heard the Germans shouting, “Come over here, we will not fire!” They got out of their trenches and started walking about on the top. Our chaps, seeing them did the same. Then all at once came the surprise. The Germans started walking towards our trenches, and two or three of our chaps went out to meet them. When they met, the Germans speaking in English wished them a Merry Christmas. ‘Then came the fun. Everybody on each side walked out to the middle of the two firing lines and shaking hands wish each other Merry Christmas. To our surprise we found we were fighting men old enough to be our fathers, and they told us they had had enough of the war, as they were nearly all married men. ‘We finished up in the same old way, kicking footballs about between the firing lines. So, football in the firing line between the British and Germans is the truth as I was one that played.


Company-Sergeant Major Frank Naden of the 1/6th Cheshire Regiment

And we also have an account in an interview at the end of December 1914 with Company-Sergeant Major Frank Naden of the 1/6th Cheshire Regiment, which was printed in the Evening Mail in Newcastle on 31 December 1914; he states:

On Christmas Day one of the Germans came out of the trenches and held his hands up. Our fellows immediately got out of theirs, and we met in the middle, and for the rest of the day we fraternised, exchanging food, cigarettes and souvenirs. The Germans gave us some of their sausages, and we gave them some of our stuff. The Scotsmen started the bagpipes and we had a rare old jollification, which included football in which the Germans took part. The Germans expressed themselves as being tired of the war and wished it was over. They greatly admired our equipment and wanted to exchange jack knives and other articles. Next day we got an order that all communication and friendly intercourse with the enemy must cease but we did not fire at all that day, and the Germans did not fire at us.

What is significant about this is that Wyatt and Naden would have been serving with each other in the same place because the 1/6th Cheshires were attached to the 1st Norfolks to be trained in trench warfare. Naden’s accounts also backs up a lot of what Albert Wyatt stated and to me confirms this aspect of what occurred as being accurate.

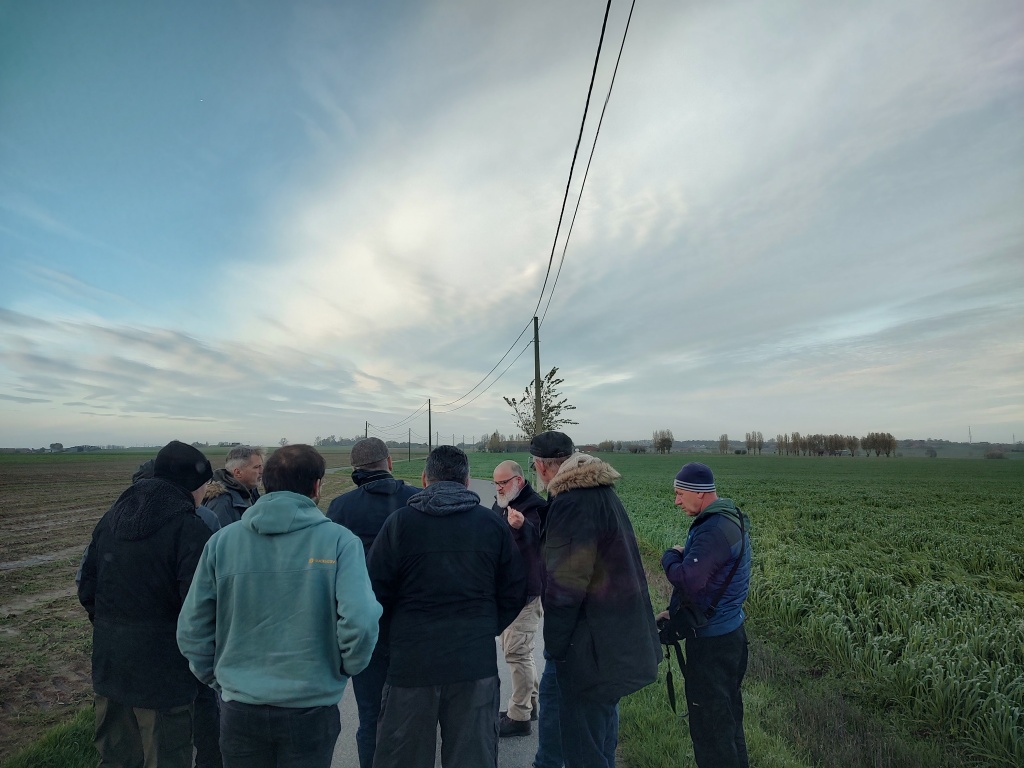
Guiding the Christmas Truce. I can be seen showing a small group where the 1st Battalion Norfolk Regiment and the 1/6th Battalion Cheshire Regiment met No 16 Reserve Infantry Regiment in no-man’s land on 25 December 1914.

This incident has become something that was put into film in 2014 when the Sainsbury’s advert about the Christmas Truce came out. If you look at the British soldiers in the advert, you will see that they are men of the Cheshire and Norfolk Regiment.


Sadly, the truce did not last, as Herbert Reeve noted:

We went to the frontline the following night and were met with a hail of bullets—an end to any such fraternisation. The High Command took a poor view of this and we were immediately posted further left towards Ypres, at a place called Dranouter.

The argument about football and the truce is something that comes around each Christmas, and people often brag that they have proof that football was played elsewhere, including the area where the UEFA memorial now stands. I have yet to see any evidence of those boasts.

I mentioned right at the start about the two failed attacks that took place on the 14th and 18th December 1914. During a another failed assault on the Bird-Cage, near Plugstreet Wood, a fifteen year old boy was killed. Rifleman 5509 Robert Barnett died in the advance. He, along with a large number of others, were recovered during the Christmas Truce. This is because one of the main reasons the truce occurred was to recover and bury the dead from both sides.

This is predominantly how both British and German troops met in no-man’s land. During this time both sides were able to bury their dead and when you read the accounts of this happening there is no mention of jolly old games of football there is just accounts of mutual respect for the recovery of the dead and talks between both sides where some gifts were exchanged.

But the reality was it was a very sombre affair and once it was carried out pretty much all over the sector the fighting carried on.

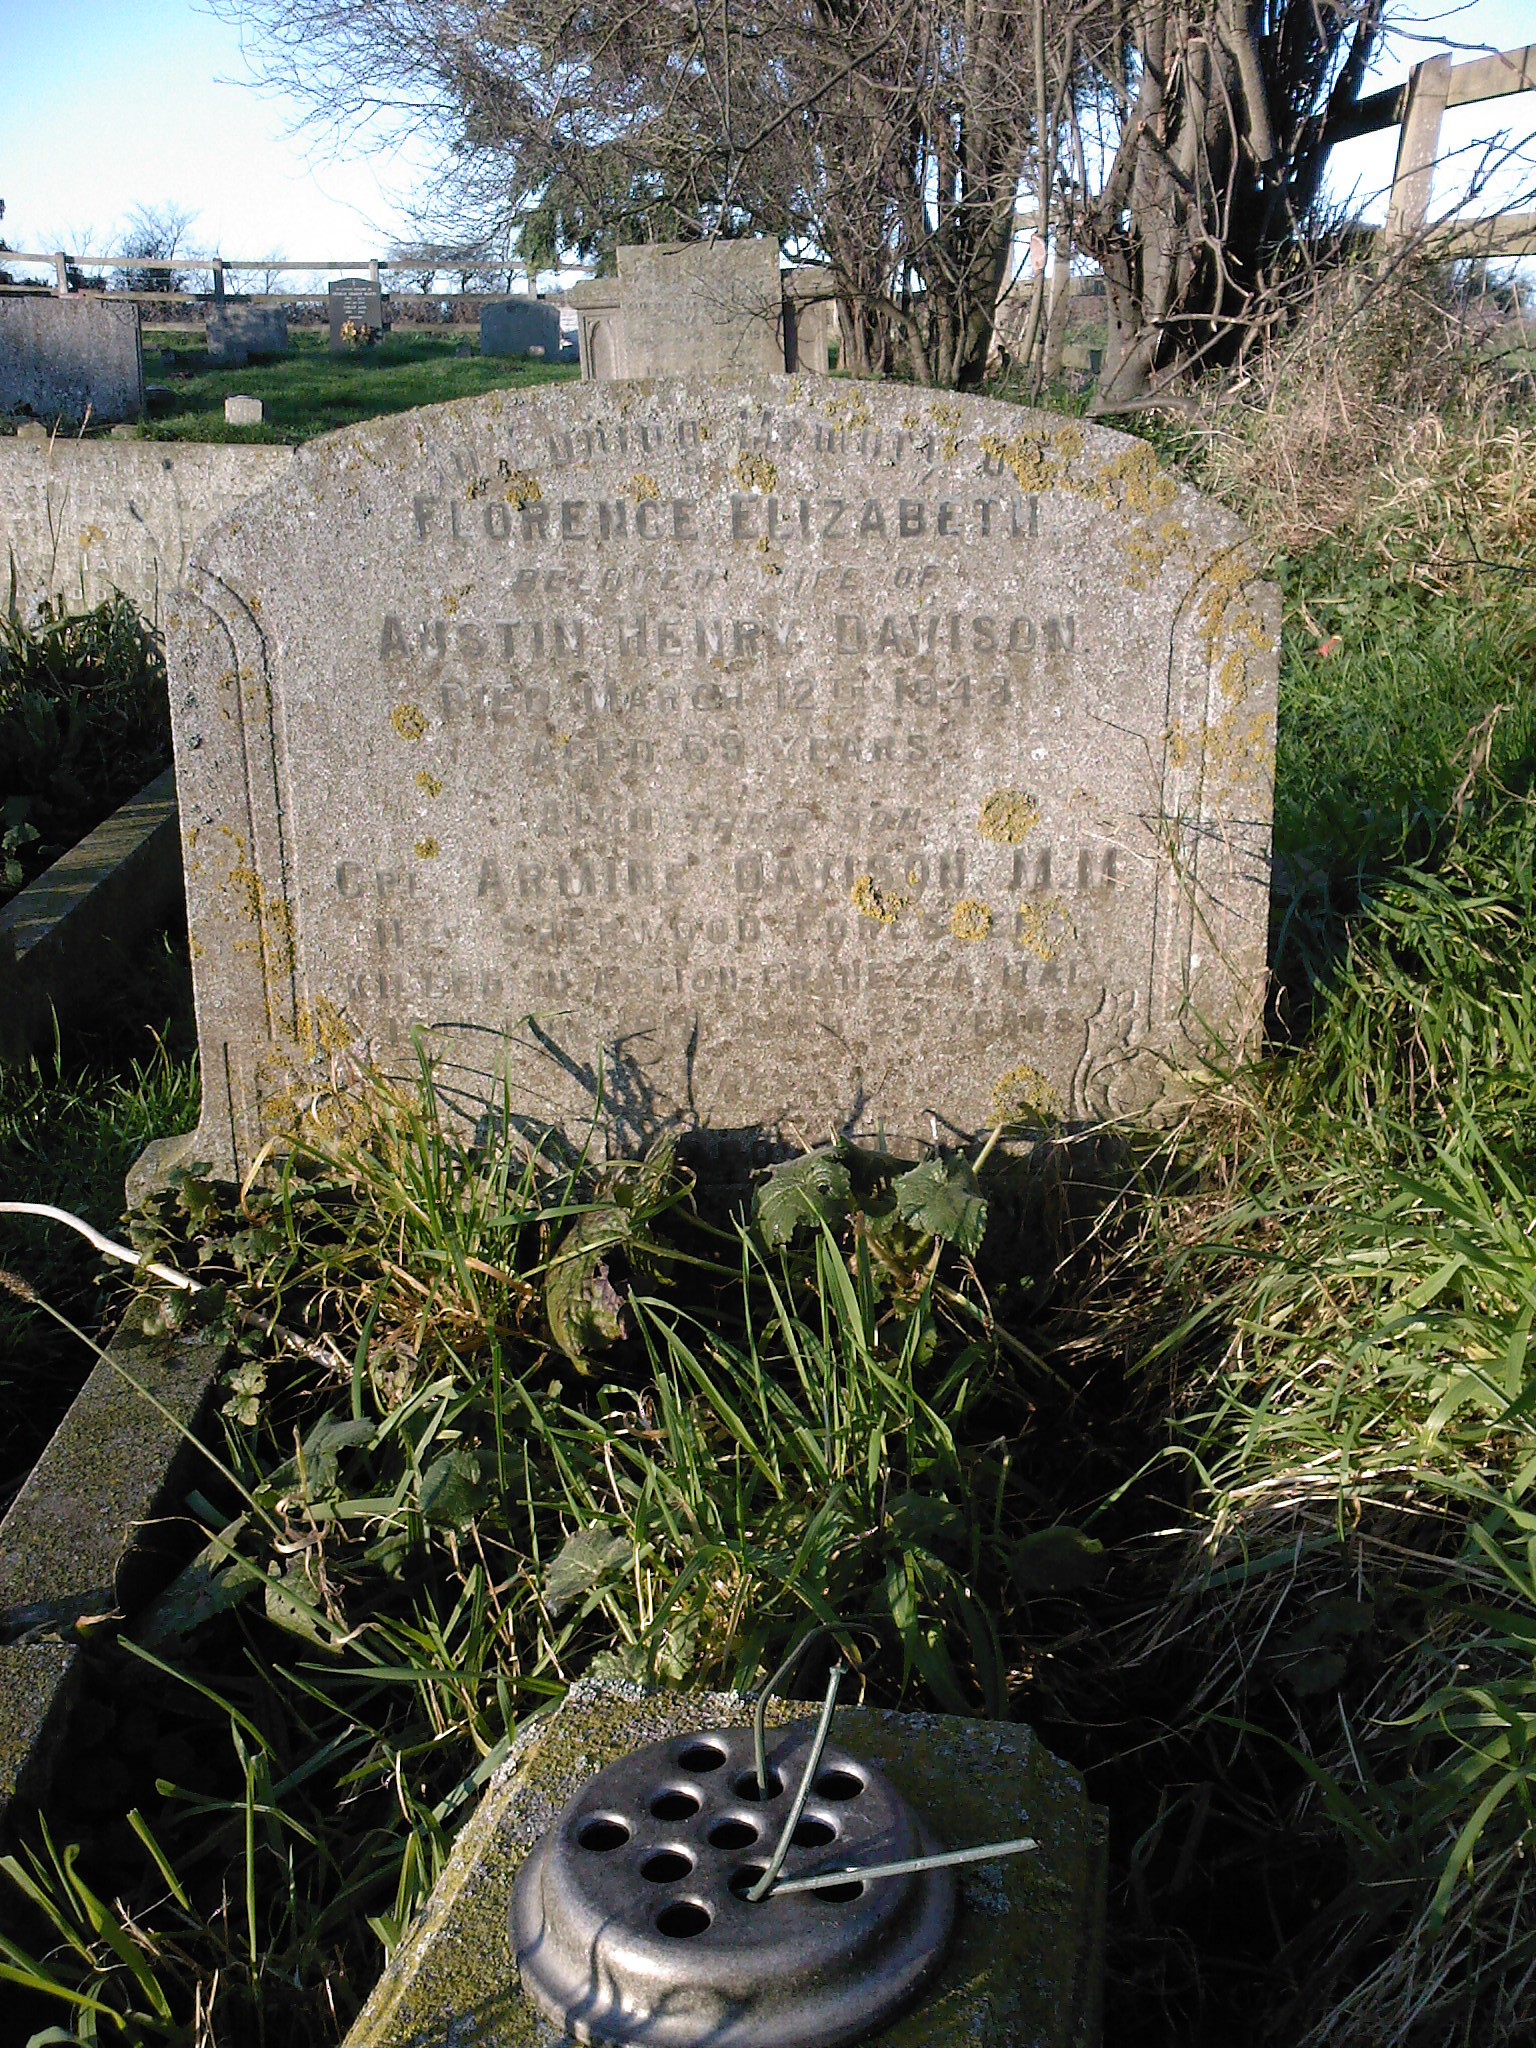
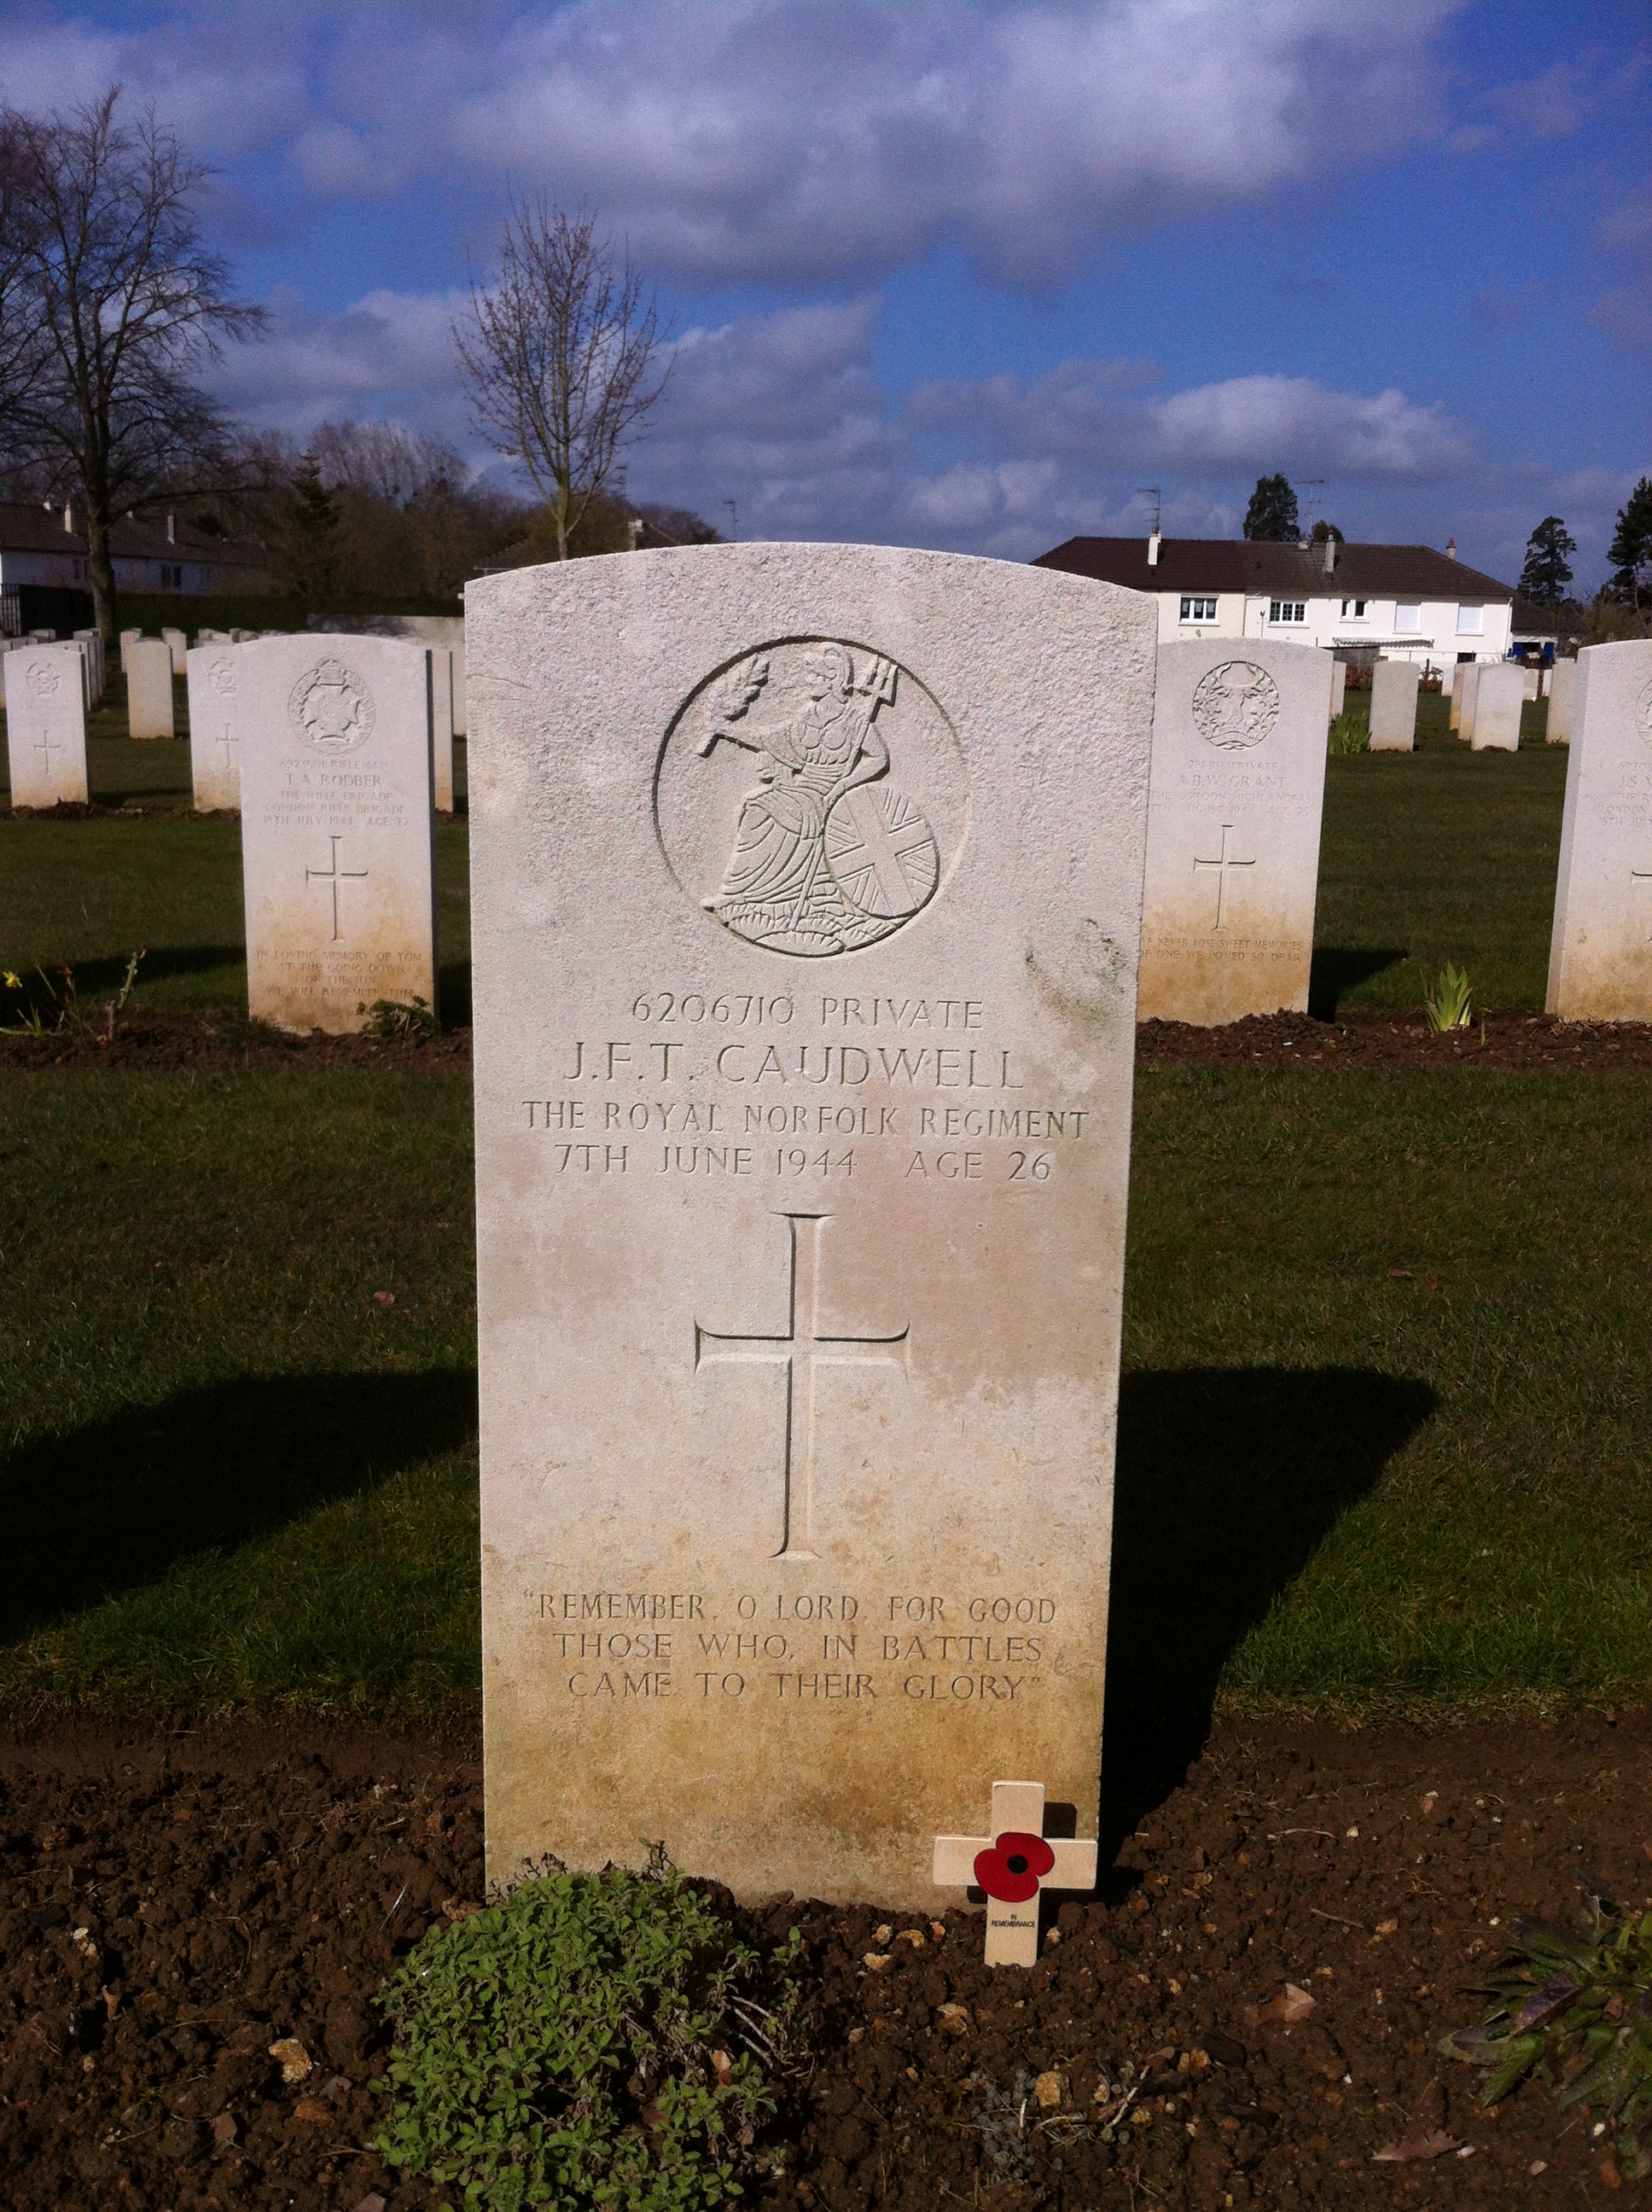
When I think of the Christmas Truce I often think of Robert Barnett who, unlike at least one other fifteen year old in this sector, very rarely gets a visitor and does not get a thought in the Christmas period because his sacrifice is overshadowed by the duff history surrounding football and the truce.

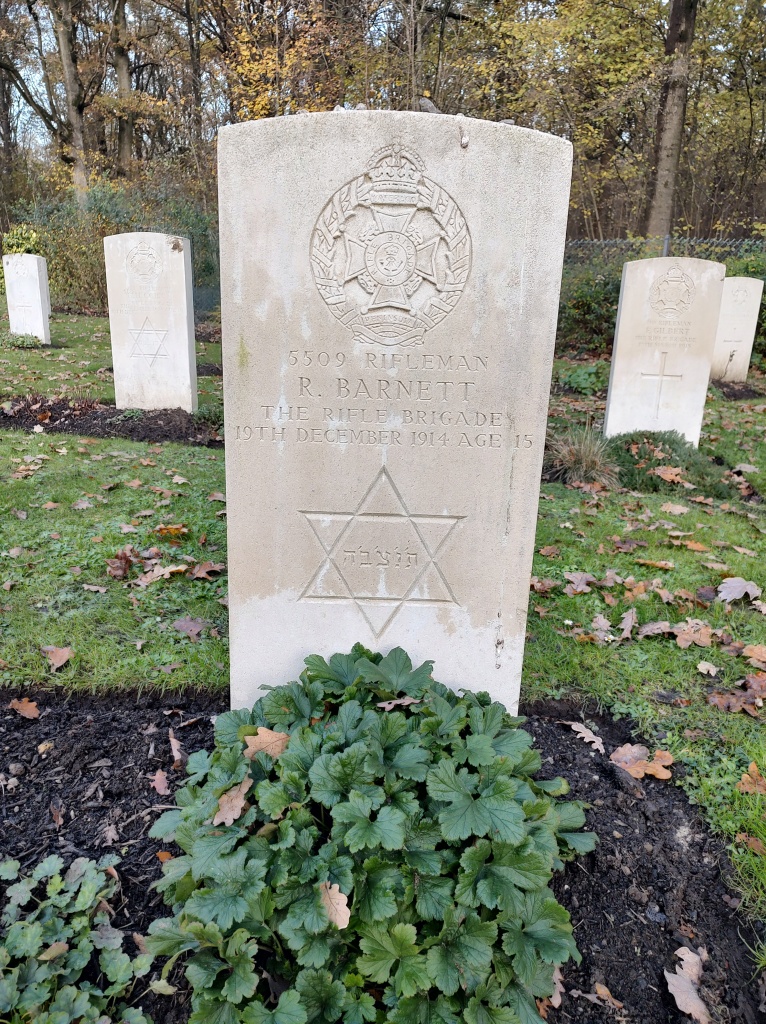
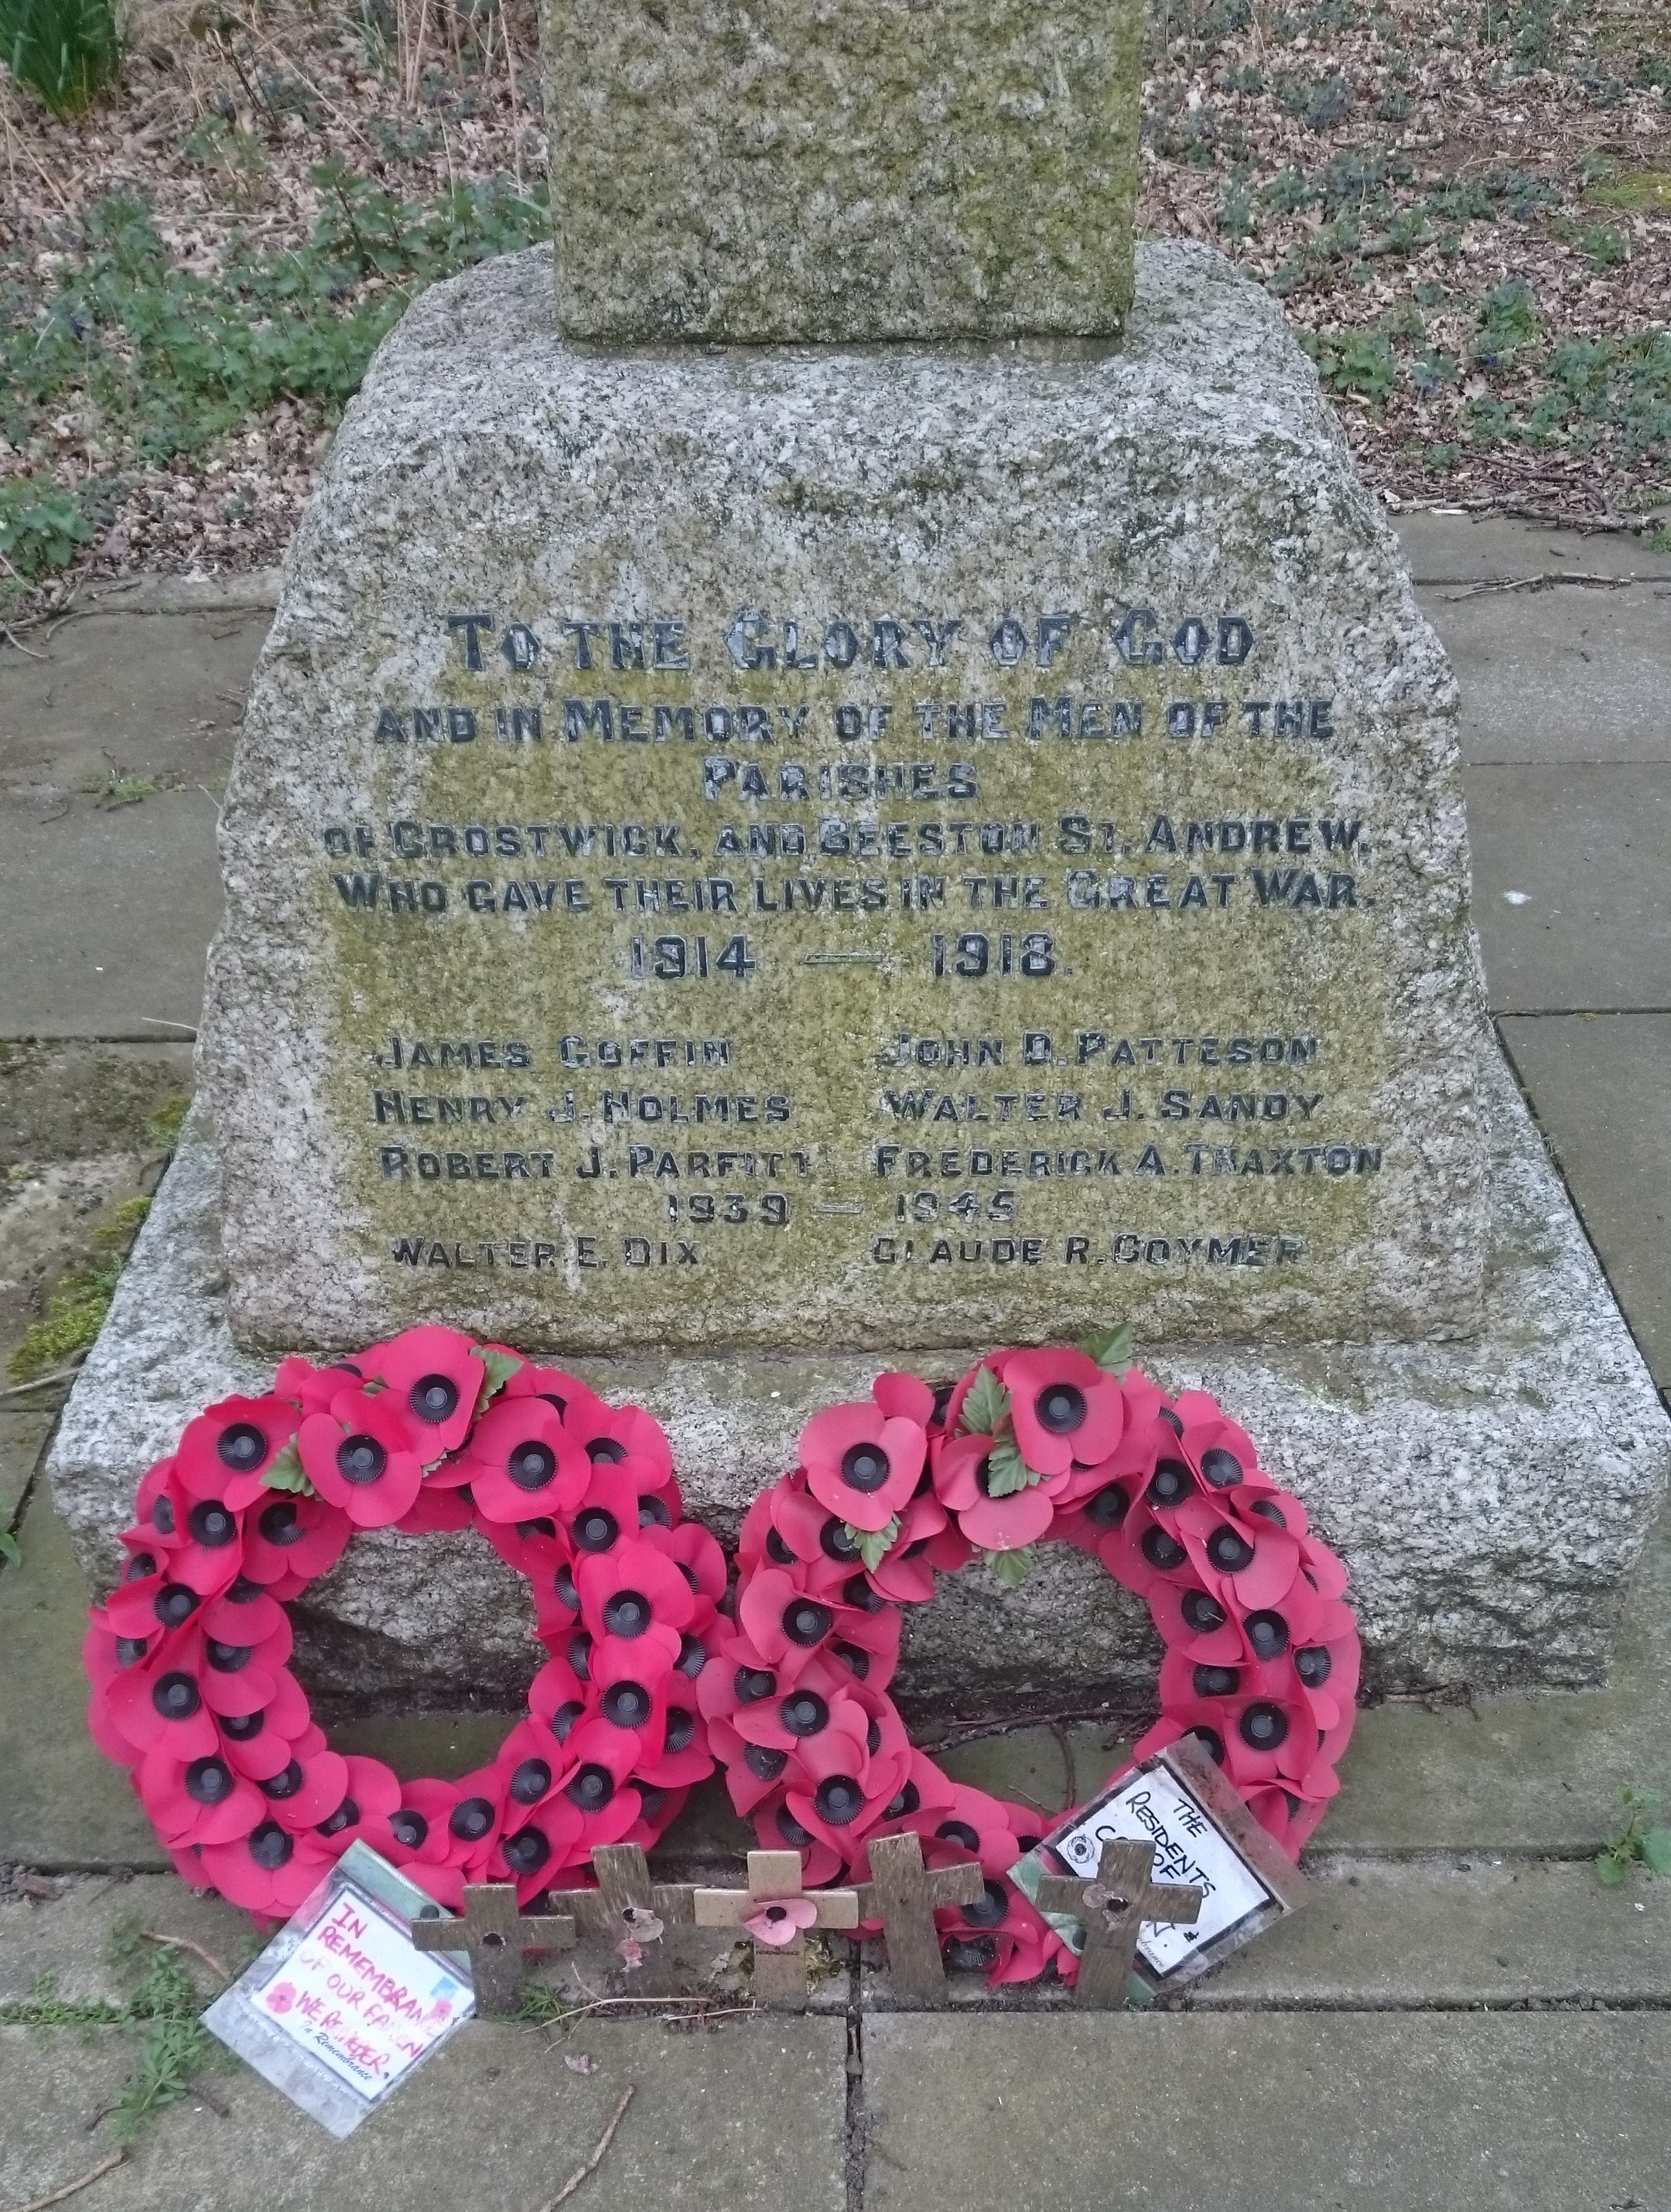
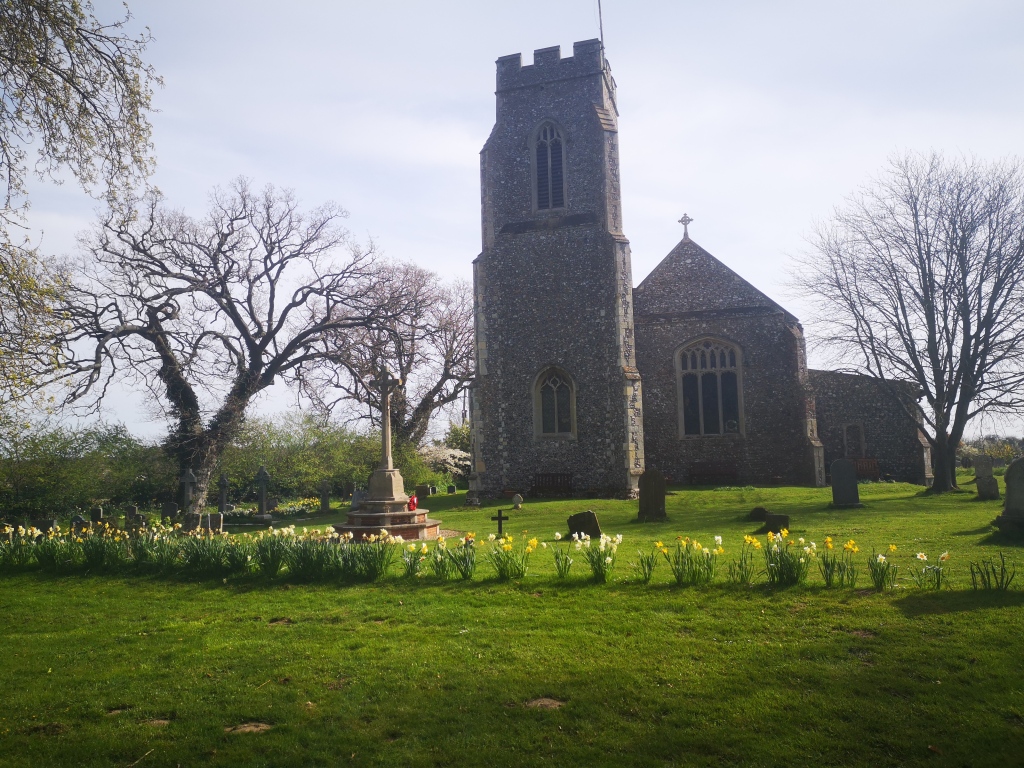
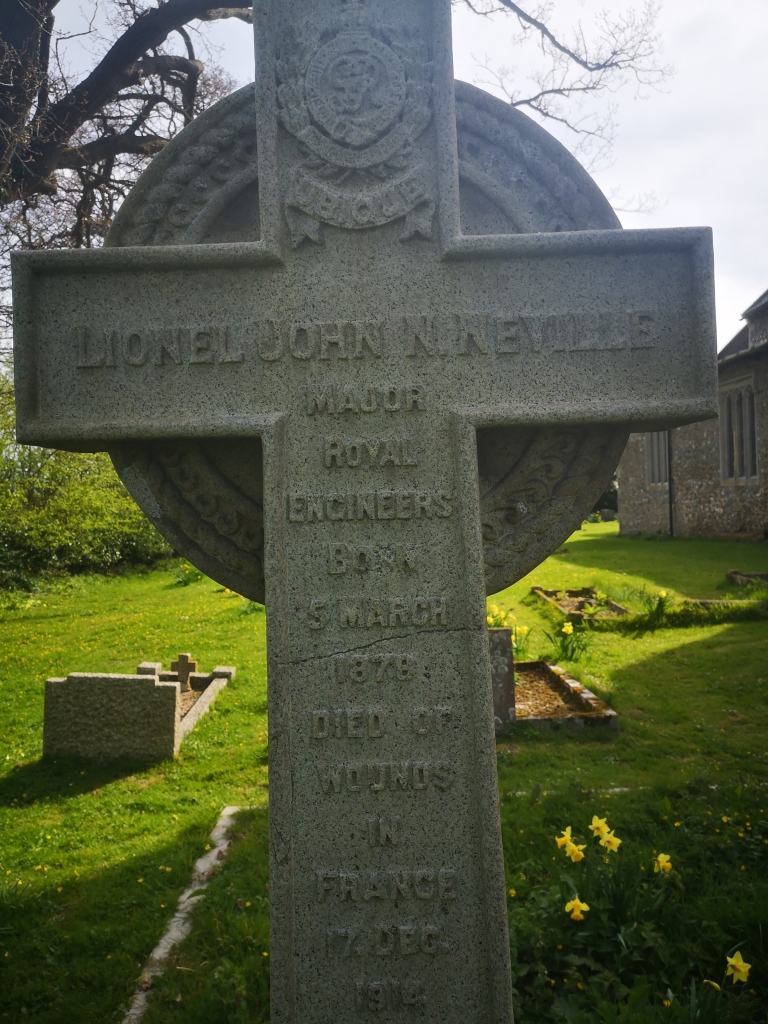
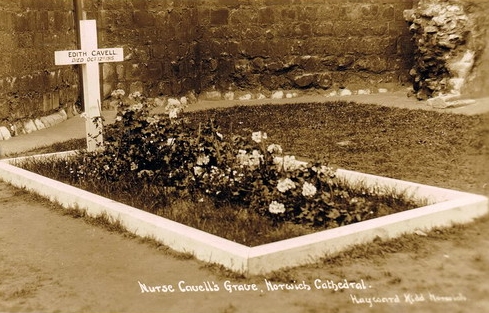
The grave of Robert Barnett who now lies in Rifle House Cemetery.

Sergeant 1496737 Jack Rowland Wales 100 Squadron Royal Air Force

Jack Wales

Recently I have revisited a man from Worstead who featured in my first book.

Sergeant, 1496737, Jack Rowland Wales, 100 Squadron Royal Air Force, was the son of Walter and Elsie Wales and was born in 1920, he is unique, to me, in that he is the only man recorded on the war memorial in Worstead in Norfolk to die serving in the Royal Air Force. His story is also interesting because his family, who I have met, were told a number of things about how he died which was not correct.

Jack qualified as an air gunner and his crew became operational from 1656 Operational Conversion Unit on 5th June 1943.

The crew consisted of the following:

Pilot: Flying Officer William Austin Gardiner a Canadian from Quebec.

Flight Engineer: Sergeant Joseph Richard Dunn from Wheatley in Yorkshire.

Navigator: Sergeant Oliver Henry Thomas Innocent from Romford in Essex.

Bomb Aimer: Pilot Officer Edward Charles Harrill from Cheddar in Somerset.

Wireless Operator: Sergeant John King from Skipton Yorkshire.

Mid Upper Gunner: Sergeant Jack Rowland Wales from Worstead Norfolk.

Rear Gunner: Warrant Officer Class II, Fred Hugh Davis, Royal Canadian Air Force, although he is listed as being Canadian, it is known that Fred actually came from Throckmorton in Texas.

Gardiner’s crew, less Fred Davis who was not present for this photo. Other than Jack, who can be seen second right, I cannot identify any of the other men.

They were posted to 100 Squadron at RAF Waltham, which was also known as RAF Grimsby, who were part of No 1 Group Bomber Command which had eleven squadrons within it who mainly operated the Lancaster. By the time Jack and his crew reached RAF Grimsby it had already undergone an upgrade to take on heavy bombers and 100 Squadron had arrived there in January 1943.

The Lancaster is generally considered to be the best wartime bomber that we operated and by 1943 there were three marks of this famous aircraft in operation. It carried a crew of seven, although specialised variants carried more, and had four Rolls Royce Merlin XX V12 Engines. It initially carried a fully laden payload of 14,000 lb, which was increased through the course of the war, and was armed with eight 303 browning machine guns.

A 100 Squadron Lancaster seen at RAF Grimsby (Image IWM)

It could fly at a height of 23,500 feet and was much loved by the crews that flew it for being a rugged and dependable aircraft to fly. It far out performed the other aircraft being used at this time and would eventually become the main bomber for the RAF.

During the research into my first book I met Jack’s sisters. I was told by them that they were informed that he was flying with an inexperienced crew when he was killed. In RAF superstition this was deemed to be unlucky. Secondly, the family was told that his crew had been lost over the English Channel. We know from a document called an Operational Record Book (ORB) that Jack’s crew were not an inexperienced crew when they were lost.

They had flown their first operation on the night of 12th June 1943 when they took part on a raid to Bochum. From June to the beginning of September they flew to the following places. Oberhausen, Cologne three times, Krefeld, Wuppertal, Turin, Hamburg three times, Essen, Remscheld, Genoa, Manheim, Milan and Berlin. Their final operation prior to their last was a fourth trip to Cologne. So, we know from primary sources that Jack flew with Flying Officer Gardiner’s crew throughout.

A Lancaster seen silhouetted over Hamburg which was one of the places Jack’s crew flew to in 1943.

In fact in the summer of 1943 Jack’s crew took part in one of the major bomber campaigns against the German capital which opened on 23rd August 1943 when Air Chief Marshal Sir Arthur Harris sent 719 aircraft to Berlin. The raid was only considered a partial success as the Pathfinders were unable to locate the centre of Berlin so only the southern outskirts could be marked. Sixty two aircraft were lost equating to 426 crew members killed, captured or missing for the loss of 2,611 properties and 854 people killed. The Luftwaffe also lost nine night fighters shot down with the loss of four pilots killed and two injured.

Further raids were sent to Nuremberg on the night 27th & 28th August and Berlin again on 31st August/1st September. Jack’s crew took part in this raid. Flying in Lancaster Mk III, Serial No JA 930, which we will come back to in a little while. 613 aircraft were sent on this raid and this attack was deemed a failure. The Pathfinders failed to mark the target properly after cloud over the target caused difficulties with their H2S radars. As was generally the case the German defences were also ready for them. The target markers were dropped well to the south of the city centre and this caused a 30 mile creep back where the bombers dropped their payloads well away from the proposed target. This raid did, however, cause the Germans to react in other ways and Josef Goebbels ordered the evacuation of all children and adults not involved in war work from the city.

In many ways this is the type of strategy that people like Harris wanted because it was not always about the amount of bombs dropped on the target but what the raid might also get the Germans to do. A good example of this is that the Germans had to pull away fighter resources from other fronts to protect their borders. 47 aircraft were lost and that equated to 225 dead aircrew with another 108 captured. Many of the bombers were lost to night fighters and this was the first time that the crews reported seeing German aircraft dropping flares over their route to mark their course. This tactic had been invented by the famous Luftwaffe pilot Hajo Herrmann. He had devised a tactic called Wild Boar which utilised single engine day fighters, as opposed to the main twin engine night fighters, to locate and shoot down the bombers. While these fighters free roamed over the target looking for the enemy, Junkers 88 aircraft from I/KG 7 dropped flares over the bomber stream. It proved to be a major success with crews reporting how quickly the Germans managed to implement this technique on the night and many bombers and their crews were lost over the target by use of this. One crew member stated,

It was like running naked through a busy railway station, hoping no one would see you.

A map of RAF Grimsby showing you the disposition of the base.

On the night of 31st August/1st September, Jack’s crew flew to Berlin in Lancaster Mk III, Serial No JA930. On this raid 316 Lancasters and 4 Mosquitos were again sent to Berlin. This raid would only comprise of Lancasters due to the recent high casualty rate of the Halifax and Stirling squadrons.

So, what really happened to Jack’s crew? Lancaster JA930 was one of two 100 Squadron Lancasters lost on this raid, with part of the official report for Jack’s aircraft stating,

Airborne 1949hrs, 3rd September 1943, from Grimsby. Believed to have exploded over Berlin.

The story about the crew being lost over the channel might have some confusion attached to it as JA969 fate was reported like this,

Airborne 1952hrs 3rd September 1943 from Grimsby. Lost without trace… Their average age was 21. Sgt E.B. Harvey KIA Sgt A.L. Kent KIA Sgt R.E. Langford KIA Sgt W.F. Garner KIA Sgt C.L. Hamilton KIA Sgt L.S. Reynolds KIA Sgt J.W. Hayton KIA.

But what proves, without a shadow of a doubt, that they were over Berlin is Pilot Officer Harrill’s body was buried in Berlin. Initially in Heerstrasse Cemetery and then finally he was laid to rest in Berlin 1939-1945 War Cemetery in Grave 1.K.17. Sadly, Jack and five members of his crew have no known grave and are commemorated on Panel 168 on the Runnymede Memorial.

Target indicators seen to be falling on the Schoneberg of Berlin (Image IWM)

Since I first wrote this for my first book, new evidence has come forward to suggest that all of the crew were buried together but the details of the six missing men were lost due to the fact that they were buried in an area that became occupied by the Russians and that they did not correctly keep records when they were moved to Berlin War Cemetery.

A relative of Pilot Officer Edward Harrill supplied me with information from the Air Historical Branch from a letter dated 20th December 1999 which states the following:

…captured German records stated that the aircraft was shot down at 00.50 hrs on 4/9/43 north east of Wilkendorf, twenty two miles north east of Berlin. After the cessation of hostilities, investigations carried out by the RAF Missing Research and Enquiry Service were made at the village of Wilkendorf, located in the Russian zone of occupation. The Burgermeister of Wilkendorf state that more than one aircraft crashed in the vicinity during the war and that all the dead had been taken to Berlin for burial. The cemetery used for Allied casualties was the District Army Cemetery Doeberitz, near Berlin and P/O Harrill’s grave was located there. Unhappily it did not prove possible to find the graves of the remaining six crew members, who are recorded as having no known grave. As was standard practice P/O Harrill’s grave was transferred from Doberitz to the Berlin (Heerstrasse) British Military Cemetery.

The memorial to 100 Squadron on the outskirts of the old aerodrome.

Looking at this, and knowing the route the bomber stream took that night, either they were hit over Berlin and were trying to make it out, or, having dropped their bombs, were exiting the target for the route home which would have initially taken them on a north easterly heading before turning north for Sweden.

The route taken by the bomber stream fore the raid on Berlin where Jack’s and his crew were lost.

My eldest daughter lives in Grimsby and recently I made a point of stopping by the memorial to 100 Squadron which can be found just off the A16 at Waltham. The old 24 end of the runway would have actually spanned the A16 but part of that is now the road and the is a housing estate on part of the old aerodrome.

The technical site is now an industrial estate and the main part of the aerodrome has now been given over to farmland like most of these old silent sentinel airfields from WW2. But there are still buildings dotted around that can be traced back to the base, including a number of hangars. As I pass the 24 end of the runway I often wonder how many times Jack and his crew flew down that runway prior to their last operation.

An original B1 Hangar from RAF Grimsby situated close to the A16

My next task is to actually go to Berlin to find Edward Harrill’s grave as he, to me, is a tangible link to Jack and his crew.

Sources: 

The Berlin Raids by Martin Middlebrook

Bomber Command Losses 1943 by W R Chorley

Major Lionel John Neville

Major Lionel John Neville (Image IWM)

I had my second book published in 2014 and within the postscript I looked at two men, one of whom, through privilege, was repatriated back to England even though he died in France in December 1914.

Major Lionel John Neville was born in Calcutta on 5th March 1878 and was educated at Charterhouse. He received a commission into the Royal Engineers in September 1897 and served in South Africa between 1900 and 1902 where he received the Queen’s Medal with three clasps and the King’s Medal with two clasps.

In October 1914, when he was promoted to Major, he went to France and ended up at Boulogne with other Royal Engineers and Royal Army Medical Corps officers to organise base hospitals. He was largely responsible for the organisation, adaption, and equipment of the Maritime Hospital on the Quay, the Casino Hospital, and other hospitals in the town and also Wimereux.

He died on 17th December 1914 after being grievously wounded near Bailleul on the last day of November and was cared for at the Casino Hospital in Boulogne with his passing was mentioned in The Bond of Sacrifice by L.A. Clutterbuck in 1917, which noted:

In November he was sent to the front to join the 5th Field Company, R.E., and on the last day of the month was transferred to the 56th Company. Within an hour of his arrival on duty in the firing zone at Kemmel he was wounded by a chance bullet, which after passing through his chest lodged in the heart of his brother officer Captain Moores, R.E. He himself chose to be nursed in the Casino Hospital, where he died, that he might himself, as he said, test whether his work there was well done.

Major Neville was buried at Sloley with military honours on 22nd December 1914. At this early stage of the war, and due to his standing in life, he numbered amongst the lucky few who were returned to their homes for burial. How did this happen?

Sloley Church where Lionel Neville is now buried, his grave can be found to the left of the tower in the front part of the cemetery.

The Commonwealth War Graves Commission was and still is very specific about repatriation. It formed part of their ethos right from the start and their website today notes this,

The dead were to be buried where they fell – there would be no repatriation of remains – and rather than a cross, a standard headstone would be used to mark their graves. For those with no known grave, great memorials to the missing would be erected to ensure they would also be remembered. In all cases, no distinction would be made between those lost – as their sacrifice had been common, their commemoration would be common also.

Lionel Neville’s grave in Sloley Churchyard.

So, the policy of non-repatriation of Commonwealth war casualties still applies and ensures that all those who died together are buried together, irrespective of how wealthy or influential their families were or when they were buried.

What was the reason for this? Well, it was decided that for both hygienic and logistical reasons the dead would remain where they fell and be buried in the cemeteries where they either laid or were to be moved to.

But Major Neville was moved and interred before all of this officially came into force in early 1915.

A close up of Major Neville’s inscription noting he died of wounds in France on 17th December 1914.

Major Neville left a wife, Agnes Lillian and two daughters and was 37 when he died. His grave is rare in the sense that very few families were able to repatriate their loved ones in the Great War and I am in two minds as to what to think about this.

First of all, I look at all of this as being in a position of privilege in order that his body was moved from France to England for him to be buried in a family plot in Sloley. Very few got that wish, unless you were sent back alive but died of wounds or illness in a hospital in this country. Who would have been able to do that had they not had standing or the finances to do it?

In my book I looked at the plight of a Norfolk man who served in the East Surrey Regiment and who died in 1918, my own Great Grandfather died in the last year of the war, his body is still missing, or unidentified, but had his body been found then his family would not have been able to get him back due to their circumstances and even now, if he was ever found, he would be buried in France where he fell. I often wonder what the villagers of Sloley thought about Major Neville being repatriated, especially when ten men from that village died serving in the Great War, all of whom are buried close to where they fell.

But, also in my mind, is the fact that close to where I live is a rare piece of history from that war. There are not that many graves in the UK that can be directly linked to this circumstance. So, as I often pass this churchyard, it does, to me, link him to an area of France and Flanders that I guide and reminds me that the Commonwealth War Graves Commission is an amazing endeavour which Rudyard Kipling stated as being…

The single biggest bit of work since any of the pharaohs!

Work which we know will carry on in perpetuity so Major Neville’s grave reminds us that this was no simple task with much that was debated in-between the wars for it to become the organisation we now know.

Private 6206710 John Francis T Caudwell

D-Day 75

1st Battalion Royal Norfolk Regiment

6th and 7th June 1944

The Bn took up old positions on ROVER and after checking, the casualties were found to be 40-50…’

From the war diary of the 1/R.Norfolk Regiment war diary.

7 Jan 13 287

Looking back towards Sword Beach from Lebisey Wood. Part of the 1st Battalion Royal Norfolk Regiment advanced in the field seen in the middle ground where they were ambushed.

This post breaks ranks in that it’s my first blog that relates to the Second World War. But I do not just guide and write about the Great War and this blog looks at a local man who died on D-Day +1.
John Francis Tynedale Caudwell was the son of the Reverend. Reginald Trevenen Caudwell and Phyllis Tyndale Caudwell, of Westwick Rectory, Norfolk who was the serving priest for Westwick Church during WWII. John would die in what is probably still classed as possibly the most momentous action of that conflict and for this we need to look at how this came about.
Britain had stood alone in WWII and had fought the Battle of Britain in the summer of 1940 and had suffered in the Blitz which occurred over the autumn and winter of 1940/1941. Campaigns in Greece failed and initially things did not go well in North Africa. However, all of that changed when the Americans came into the war after 7th December 1941. Another major thing occurred in 1941 when Hitler opened up a second front with Russia when he invaded that country under the codename of Operation Barbarossa. The Russians continually put pressure of the British and the Americans to open up a second front in Western Europe. Some of this was placated by the invasions in Italy. However, this was not going to be the pushover it was first thought and the fact remained that Hitler’s ‘Festung Europe’ or Atlantic Wall as it also came to be named lined the coast along Europe’s shores. Plans were set in motion in both 1942 and 1943 to do just this but these were shelved especially after the failed landings at Dieppe on 19th August 1942 when it became clear that it would be very difficult to capture and hold one of the main French ports.
The plan that would become D-Day was first started in March 1943 and was given the codename ‘Overlord’. Two sites were considered by Supreme Headquarters Allied Expeditionary Force (SHAEF), led by General Dwight D. Eisenhower. These were Normandy and the Pas de Calais. Both were considered because it would be important for Allied airpower to be able to operate over the landing beaches. The Pas de Calais was then discounted because it was far too heavily defended and it was also where Hitler expected the landings to occur. That left Normandy.
The objective for the first 40 days was to create a lodgement on the beaches that would allow the Allies to capture the important cities of Caen and Cherbourg. This would then allow a break out in order to liberate the rest of France and subsequently the rest of Northern Europe. In the weeks leading up to the invasion a number of diversions and feints were made.
Operation Fortitude North would lead the Germans to expect an attack in Norway; the much more important Operation Fortitude South was designed to lead the Germans to expect the main invasion to be the Pas de Calais An entirely fictitious 1st U.S. Army Group (FUSAG), supposedly located in south eastern England under the command of General Lesley J. McNair and General George S. Patton, was created in German minds by the use of double agents and fake radio traffic. Dummy landing craft, constructed from scaffolding and canvas, were placed in ports on the eastern and south eastern coasts of Britain, and the Luftwaffe was allowed to photograph them. Both deceptions worked and the Germans kept troops at both locations in anticipation that the Allies would land there.

Juno

Rommel’s asparagus seen from a low reconnaissance pass. Note the German soldiers takin cover.

The Germans had planned for an invasion since 1942 and as the threat became ever more realistic the commander in the West, Field Marshal Gerd von Rundstedt requested assistance. He was given a second in command in the guise of Field Marshal Erwin Rommel. Rommel was famed for his actions in North Africa and was a favourite of Hitler. He found the defences along the coast woefully lacking and he set about improving the defences. Steel obstacles were laid at the high-water mark on the beaches, concrete bunkers and pillboxes constructed, low-lying areas flooded and booby-trapped stakes known as Rommelspargel (Rommel’s asparagus) set up on likely landing grounds to deter airborne landings.

Rommel

Rommel seen inspecting beach defences on the Normandy coast.

Rommel had told his commanders that when the day came it would be decisive one where the defenders had to win, stating,

Our only possible chance will be at the beaches, that’s where the enemy is always weakest.

Field Marshal Erwin Rommel
But Rommel’s defensive measures were hampered by a dispute over the release of the famed panzer divisions. He wanted them at the beaches so that their firepower could be brought to bear on the landing craft and men. Other commanders disagreed and wanted the panzers away from the beaches to react to the invasion when it came. Hitler made the decision for his commanders and allowed Rommel three panzer divisions and the rest in reserve. He also provided a caveat that only he and he alone could order the release of the panzers when the day came. This would have far reaching consequences on D-Day. Therefore the Germans would only be able to defend the beaches of Normandy with four divisions of which only one was any good.

The final factor of the day would be the weather. Due to bad weather Eisenhower had to postpone the initial date of the landings which had posed a great risk to the secrecy of the whole operation as troops were actually on their way to Normandy when he gave the order to postpone. It was one man, Group Captain James Stagg, an RAF meteorological officer who would eventually allow Eisenhower to give the green light for the 6th June 1944 when he told him that there would be favourable weather conditions for that day.

Early on the morning of the 6th, having taken and carefully considered the best meteorological advice, Eisenhower ordered Operation Neptune, the sea borne phase of Overlord, to begin. Later, Stagg’s memorandum to an official report to Eisenhower on the meteorological implications of the 6th June stated that had Neptune been delayed until the next suitable tides the troops would have met the worst Channel weather for 20 years.
Eisenhower wrote across the bottom of the memo:

Thanks, and thank the Gods of war we went when we did.

The other factors of the support network would be that the French Resistance would assist the invasion by carrying out raids on various targets of importance. They were actioned by the use of code words known as ‘messages personnels’, which were transmitted by the BBC in French from London. A few days before D-Day the most famous of these and shown on the famous film ‘The Longest Day’ were transmitted in two stages. The first line of Verlaine’s poem, ‘Chanson d’Automne’ (Song of Autumn), was initially transmitted which said. ‘Les sanglots longs des violons de l’automne’, (Long sobs of autumn violins). This alerted resistance cells in the Orléans region to attack rail targets within the next few days. The second line, ‘Blessent mon coeur d’une langueur monotone’, (Wound my heart with a monotonous languor), was transmitted late on the 5th June and meant that the attack was to be mounted immediately. Although the Germans understood the significance of this statement it was ignored by commanders on the ground that deemed it to be another annoying false alarm.The resistance would also be supported by the Special Operations Executive (SOE) who were to drop three man liaison parties into Normandy under the codename of Operation Jedburgh. These teams assisted in the coordination of supply drops and further assistance was given by parties from the British, French and Belgian units of the Special Air Service brigade.
To assist the troops landing on the beaches new support weapons were also invented. Known as ‘Hobart’s Funnies’ after the man who invented them, Percy Hobart, they were designed to breach the beach defences. These weapons included swimming DD tanks, Crab mine clearers, and AVRE (Engineer) tanks along with a regiment of Crocodile flame throwing tanks. The Americans liked the amphibious tanks but Eisenhower left the decision on the other weapons to General Omar Bradley who would lead the assault on the American beaches, who in turn left the decision to take them to his staff officers. None of the other designs were used, because it was thought that they required specialised training and an additional support organisation. This would have serious consequences for the men landing on Omaha Beach.
Operation Neptune as already stated was the code name given to the initial beach assault for Overlord. This armada would land nine divisions and was drawn from 8 different navies.
The overall commander of the Allied Naval Expeditionary Force, providing close protection and bombardment at the beaches, was Admiral Sir Bertram Ramsay who had been responsible for the planning of the invasion of North Africa in 1942 and one of the two fleets carrying troops for the invasion of Sicily in the following year. The Allied Naval Expeditionary Force was divided into two Naval Task Forces, Western and Eastern. The warships provided cover for the transports against the enemy whether in the form of surface warships, submarines or as an aerial attack and would give support to the landings through shore bombardment. These ships included the Allied Task Force ‘O’ and the Royal Navy’s Home Fleet would also participate by securing the flanks of the invasion from any German naval attack.

1024px-Map_of_the_D-Day_landings.svg.png

The five beaches for D-Day, both flanks were protected by airborne drops.

Five beaches were chosen that were given the code names Sword, Juno and Gold in the case of the British and Canadian beaches and Omaha and Utah in the case of the Americans. They would stretch from the mouth of the River Orne and Les Dunes de Varneville. Airborne drops would be made on the flanks by the British and the Americans and bridges across the Orne and the River Dives would also be captured and secured by airborne and glider troops.

About 6,939 vessels would be involved in the invasion, including 4,126 landing craft. 11,590 aircraft, under the command of Air Marshal Sir Trafford Leigh-Mallory, were to support the landings, including 2,395 transport aircraft and 867 gliders to fly in the airborne troops. 10,000 tons of bombs would be dropped against the German defences, and 14,674 attack sorties would be flown. The landings would be made by approximately 156,000 troops.

Sword Beach

Queen Beach seen from the air, note Lebisey Wood can be seen in the distance.

The 1/R.Norfolks were part of the 185th Infantry Brigade of the 3rd Division. This division had seen action in the fighting in France and the retreat to Dunkirk in 1940 and had two other brigades, the 8th and 9th as part of its make up. Since 1940 they had spent all their time in the UK before being selected to take part in Overlord. The 3rd Division would be one of the first British units to land at Sword Beach.
This beach was nearly 5 miles long and stretched from Ouistreham on the mouth of the River Orne to Saint-Aubin-sur-Mer and would be the the eastern flank of the landings with the beach divided into four zones, Oboe, Peter, Queen and Roger. They would face the German 716th Infantry Division and also had the risk of coming up against the elite 21st Panzer Division who were stationed around Caen. Their task would be to capture Caen, situated just over 9 miles away and secure the important airfield at Carpiquet.
Secondly, commando elements would link up and with the paratroops of the 6th Airborne Division, who were holding the bridges across the Orne, and would assist in securing the Merville Gun Battery which was to be taken out in a ‘Coup de Main’ operation.
The landings were set to begin at 07:25hrs and the 3rd Division would land between Peter and Queen.

Sword Beach Assault Plan

Queen Beach where the 1st Battalion landed on D-Day.

The landings were successful with most of the resistance on the beach being overcome within an hour of landing. The Commandos were able to move inland and link up with the airborne troops and contact was made with the Canadians landing at Juno Beach. It was here that we saw Hitler’s flawed plan of keeping the panzers away. When the attack came there was much debate as to whether these were the main landings and his commanders argued this point. They also failed to wake him and this gave the Allies time so that when the only significant German counter-attack came at 16:00hrs on the 6th June the 21st Panzer Division which had pushed all the way from near Caen to the beaches between Lion-Sur- Mer and Luc-Sur-Mer and were stopped losing 54 tanks destroyed or disabled out of 98.The day ended with 28,845 British troops coming ashore on Sword for only 630 casualties. But Caen was not captured on the day, nor was Carpiquet. The other beaches were successful although the Americans suffered terribly during their assault of Omaha Beach losing 3,000 men killed or wounded and very nearly had to deviate to Utah Beach. However, tenacious fighting sometimes from small pockets of infantry and rangers won the day and Omaha was secured by the evening.

We will now cover the 1/R.Norfolk’s experiences on D-Day and also D+1 when John was killed.

Sword

Infantry waiting to move off ‘Queen White’ Beach

The 1/R.Norfolks landed at 09:50hrs on D-Day coming in on Queen Beach, situated between Lion and La Breche. Their role was to move further inland where they would then relieve the 1st Battalion Suffolk Regiment, which they did at 12:00hrs, under heavy shell and mortar fire. An excellent account of what happened during D-Day and D+1 comes from Private Geoffrey A Duncan of the 1/R.Norkolks.

Queen

Queen Red sector on Sword Beach with a clutter of tanks lining the shore, one of which appears to be on fire.

Struggling down the gangway I blessed the Captain who kept his promise to take us in as close to the beach as was humanly possible It was ironic that during all our practice landings prior to D-Day we never had any waterproof clothing at all and got soaked wading ashore, now here I was virtually stripping straight on to dry land. Once ashore one had to discard the waterproof suit and this is where I ran into trouble, my suit got hooked up on the entrenching tool on my back. God, I thought, I shall get clobbered before I even got off the beach. I finally struggled free from my suit and must have aged ten years in as many seconds, then ran up the beach to the coast road. I turned and looked back down the beach, the landing ship from which we had just disembarked had received a direct hit on the bridge , then scrambled through the gap in the barbed wire defences making doubly sure we kept within the two white marker tapes which told us this track had been cleared of mines. The shells were constantly shrieking overhead, we would hit the deck and get bawled at by our sergeant.

Private Geoffrey A Duncan, B Company 1/R.Norfolk Regiment, page 24 Thank God and the Infantry by John Lincoln page 24-25.

Part of the initial phase was for the Suffolks to capture the German strong point code named ‘Hillman’. However this managed to hold out all day, having been found to have been more formidable than first thought, and this forced the Norfolks to go round the left of this position where they sustained casualties from British tanks who thought the advancing men were enemy evacuating Hillman. During this advance they had to move in the open and came under fire from Hillman.

IMG_3894

Part of the Hillman Bunker looking back towards Sword Beach.

As we cleared the outskirts of Hermanville we lost the open cover of buildings and trees on either side of the road and emerged into open country, here we were soon spotted and it wasn’t long before 88s and mortars were giving us a pasting; we didn’t hang about there too long but lost several lads on that open stretch of road. As we approached the western outskirts of Bieville we could hear there was stiff opposition on the far side of the village, in the village itself there were knocked out vehicles, German dead lying sprawled on the road and several lads from the Suffolk Regiment lying dead in various places, one in particular had been shot down in the middle of the road and a tank had run over him.

Private Geoffrey A Duncan, B Company 1/R.Norfolk Regiment, page 24 Thank God and the Infantry by John Lincoln page 24-25.

During their advance the Norfolks incurred around 150 casualties, including twenty men dead, although this event is not mentioned in the R. Norfolk’s war diary.

By nightfall they found themselves as the war diary records,

…consolidated for the night on Rover some way short of Caen which was budgeted as D day objective for 185 Inf Bde.

Rover was a code name for a farm called Bellevue Farm, situated to the south of the Hillman bunker complex and other known strong points code named Morris and Daimler and positioned to the south of Beuville and to the west of Benouville and was a small wood situated on a small rise. Here they stayed overnight around the farm house which they called Norfolk House. It is known that the operational orders for 1 Corps and the 3rd Division used names of drinks, vehicles and even fish to describe French villages.

Norfolk R Record

Part of the after action report from the war diary of the 1st Battalion Royal Norfolk Regiment for D-Day and Lebisey Wood.

On the 7th June, D+1, the 2nd Battalion Warwickshire Regiment was ordered to advance through Lebisey Wood, which was a mixture of orchard and wood, situated around Lebisey Village, which it was to take and hold thereby securing the Lebisey Ridge which in turn would allow the British 3rd Corps to secure the line around Caen. The battalion’s war diary does not mention many objectives by name and within it there are two positions that are mentioned by code name. These are ‘Vermouth’ and as already mentioned ‘Rover’. We can certainly position Vermouth as being close to the other French town of Lebisey situated to the north east edge of Caen as well as Lebisey Wood which is mentioned in accounts from Norfolk Regiment men.

The Warwick’s advance began at 08:45hrs and did not go to plan. They advanced up the slope of Lebisey Ridge and did not realise, as they moved through the summer cornfields, that they were being watched by elements of 125 Panzer Grenadiers from 21st Panzer Division, who were positioned in well concealed woods. At 100 hundred yards they opened fire on the Warwicks who became pinned down. Soon afterwards their C.O., Lt Col H.O.S. Herdon was killed and their second in command, Major Robin Kreyer, had to take over.

Their carrier and anti tank platoons also fell foul to an ambush as they tried to move forward on the road situated between Beuville and Bieville and into the wood they were ambushed.

The Warwicks lost all their officers killed or captured and by 17:00hrs they were under attack from German armour and had reported that they were surrounded and almost out of ammunition. The R.Norfolks were called upon to assist the Warwicks. In Norman Scarfe’s excellent book ‘Assault Division’ he recounts that the official historian for the 1st Battalion recounted their participation in this assistance thus,

Unfortunately the Warwick’s attack went off at halfcock and they found themselves in a very difficult position, being unable to move. There was nothing for it, and we had to go and restore the situation. 4 p.m. was H-hour and up we went, through sniped village, across the anti-tank obstacle and up through open corn to the wood. It was not easy going, but we managed to get out anti tank guns and mortars to a position from which we could give some support. The forward companies were having a bad time and we suffered quite a number of casualties; enemy tanks were also reported and altogether it was most unhealthy. At this point a big decision had to be made and the unfortunate C.O. had been authorised by the General to make it. Were we to withdraw at last light to the other side of the anti tank obstacle, or were we to hang on where we were and hope for help at first light? To judge from future events this decision was left to the Warwicks. The time chosen was just before last light, and this choice made all the difference, for as soon as the last troops left the area the enemy shelled it and mortared it severely, fortunately hitting the air where we had been.

Assault Division by Norman Scarfe, page 57 to 58.

The war diary is not very forthcoming as to where the main casualties came stating,

Under very heavy fire of all kinds, the C.O. remained in posn until dark and then drew out under cover of arty and naval arty support. The Bn took up old positions on ROVER and after checking, the casualties were found to be 40-50, including Lt Sharp and Campbell of ‘C’ Coy missing.

In another account we can get a feel for what happened to the Norfolks as they advanced towards Lebisey and more specifically Lebisey Wood.

First we had to capture the woods called Lebisey and, as we advanced along a sunken road in full view of the Germans, they let us have it. Mortars and shells came raining down. With no cover at all, all we could do was bury our heads in the dirt. We lost a lot of lads that day, arms and legs everywhere. Then as we advanced up the fields towards the wood, Jerry snipers were sending up the dirt all around us. We reached the edge of the wood only to find it had been mined by the Jerries, who by now had pinned us down with rifle and machine gun fire. Once again I buried my face in the dirt, lying on my belly trying to dig a hole to crawl into.

IMG_3877

John Caudwell’s grave in Ranville War Cemetery

We can clearly state, that during this action John lost his life. Lieutenants Sharp and Campbell were also found to have been killed in action on this day and the battalion lost 40 men killed between the 6th and 7th June 1944. John is now buried in Grave V. C. 18 in Ranville War Cemetery and was aged 26. He also has a memorial, this time in St Botolph’s Church Westwick, where the inscription reads,

Hallowed in Christ be the memory of all gallant men and women who fell in the great war 1939-1945 for the freedom of the world they shall yet stand before the throne an exceeding great army and in that last muster shall be found this our own beloved John Francis Tyndale Caudwell June 7th 1944. That they might have life.

There is no record of how this memorial tablet came to be erected in Westwick Church but it is almost certain that it would have been Caudwells who would have asked to have it erected.

Edith Cavell’s Funeral

Centenary Blog

15th May 2019

img075b

Edith Cavell’s coffin was loaded onto a gun limber after it arrived at Norwich.

Today, 15th May 2019, marks the 100th Anniversary of Edith Cavell’s funeral.

After the war it was decided that Edith Cavell’s body would be repatriated and her body was exhumed on March 17th, 1919. On May 13th, 1919. Edith’s body was taken to Ostend, escorted by British soldiers, and here she was taken to England on HMS Rowena on May 14th, 1919.

Rowena

HMS Rowena seen entering Dover Harbour (Image IWM)

As HMS Rowena arrived at Dover a full peal of Grandsire Triples was rung on the bells of the parish church. The peal was notable and reported by the local press at the time,

The ringers … are ex-soldiers, F. Elliot having been eight months Prisoner of War in Germany.

This deep (or full) muffling is normally only used for the deaths of sovereigns.

WW1 steam engine 2275 Edith Cavell Lest We Forget2

The steam engine that pulled the van that carried Edith Cavell’s body to Norwich

The following day her body was escorted to London for a service of remembrance at Westminster Abbey. Edith’s execution was still a very raw subject and there was a public outpouring of grief, with The Times recording:

At almost every station along the way and at windows near the railway and by the bridges there were crowds of children quietly and reverently watching the passing. The boys saluted, the girls stood silently gazing.

DSC_0195

The Cavell Van which carried Edith’s coffin to Norwich, seen here in 2015 when it was placed outside the Forum on the around the 100th Anniversay of her death

The train to London was accompanied by members of the Cavell family, and a horse drawn gun carriage took it through streets lined with spectators and the service was attended by King George V. Queen Alexandra had sent a wreath and had written within a card,

Life’s race well run
Life’s work well done,
Life’s crown well won,
Now comes rest

Nurse Edith Cavell Funeral Procession 15May1919

Edith Cavell’s body was paraded through London and a memorial service was held in Westminster Abbey

After the service at Westminster, another train transported Edith’s remains to Norwich Thorpe Station. The coffin was put on another gun carriage and escorted to Norwich Cathedral. Preceding the coffin were soldiers with reversed rifles, a military band and a large number of nurses. The Norfolk Regiment provided the pall-bearers for the funeral and one of them was Sgt Jesse Tunmore, who Edith had helped to escape in 1914.

img077a

Edith Cavell’s body being carried into Norwich Cathedral escorted by nurses and carried by soldiers from the Norfolk Regiment, including Jesse Tunmore, seen centrally as a pall bearer, who Edith had helped to get out of Belgium in 1914

The Archbishop of Norwich, Dr Bertram Pollock, then presided over another service. Bishop Pollock described her as ‘alive in God’ and as someone who taught us that our patriotism must be examined in the light of something higher. Edith’s remains were then interred in a simple grave by the cathedral.

Norfolk Constabulary0029

Norfolk Regiment buglers stood over Edith Cavell’s grave during the funeral and played the Last Post

A witness to the funeral noted in a letter to a friend,

I have never known anything more simple nor of more dignity; nor was there anything tense in the crowd, which very much puzzled me and made me wonder if we were in the presence of the new spirit of the age, when a soldier woman was accepted as a matter of course.

MWSnap693

The original grave in the grounds of Norwich Cathedral

DSC_0004_2

Edith Cavell’s grave as it is seen today

‘I am passing into the great divide.’

Sergeant Major, S/12784, Arthur Joseph James Fairbairn

490th Horse Transport Company Army Service Corps

Image 30

Arthur Fairbairn’s grave in Worstead churchyard

I came to write my first book because of two war graves in Worstead churchyard. This is the story of the second man.
Arthur Fairbairn was born in Bermondsey and resided in Croydon. He is the other man who is listed as a CWGC burial in Worstead churchyard. He is not listed on the war memorial and he is not listed on the Norfolk Roll of Honour and yet he lies in Norfolk.
The question that had to be asked in this case was why is a man who resided in London buried in Worstead churchyard? He did not die here as evidence shows he died in Great Boughton in Cheshire and was living in Chester with his wife when he died. The simple answer is that his wife was Ethel Maria Blower who is listed on the 1891 Census as being the daughter of David and Ann Blower of Worstead. Arthur Fairbairn was a pre war regular, having seen active service in South Africa. In fact both were still in South Africa when the 1911 Census was sat.
His WWI service career is an interesting case and one that can be traced exactly as his service record survived WWII. Even more interesting is the fact that his death is recorded exactly as it happened because it became a newspaper article when his coroner’s report was published.
He briefly went to France landing there on the 8th May 1915, but on the 27th May 1915 a letter was sent to 3rd corps HQ from the CO of the 9th Division, Major General H.J.S. Landon, stating that Arthur was not fit enough to serve.
The letter noting that,

‘He was appointed a few days before the Division left England and appears to be incapable of picking up the work.’

The letter went on to state that, ‘…a younger and more energetic man is essential in the field.’

On the 8th June 1915 Arthur was back in Blighty and spent the rest of his time in England. The cause of all of this was probably the fact that he had contracted Pneumonia in August of 1914. However, this did not stop him providing a good service for King and Country and he was mentioned in the Secretary of State for War’s list of valuable services rendered during the war and this was published in the London Gazette on the 24th February 1917.
In August 1918 Arthur had applied to go to Salonika, but before this could happen he died suddenly and we will now look at the sequence of events that led to his death. This occurred nine days after the massive Allied strike on 17th August. For this purpose I have transcribed the report of his passing although parts of it are unreadable due to the fact the document came from the burnt records archive in the National Archives.

Image 31

The report into Arthur’s death

STAFF SERGEANT MAJOR’S SUDDEN DEATH

The sudden death of Staff Sergeant Arthur Joseph James Fairbairn (40) A.S.C. was the subject of an enquiry before (the) Cheshire Coroner, at the war hospital Hoole, on Monday afternoon. The evidence of Corpl. Wm Chas, Hindley A.S.C. employed in the General Staff Officer Headquarters Western Command, for nearly two years, shewed that deceased was a first class sergeant major in the same office. For about … months he had been in failing health … often spoken of having a ‘racking’ cough. On Monday he came to the office and seemed in his usual health. About 12 noon he left to go to the canteen at the Roodee. About 12.55 witness proceeded to the mess. On arrival he heard someone call ‘Hindley,’ and upon looking towards the city walls near the …gate he saw the deceased.

He went up to him and deceased said ‘Get a doctor, please.’ He coughed and vomited blood. Witness assisted him towards the dry canteen and on the way he vomited more blood. Witness has already sent for medical assistance and went for a doctor himself. Sergt Major Thomas Kirby, R.A.M.C., deposed to seeing the deceased in the sergeant’s mess at the Roodee at one o’clock on the Monday. He appeared to be in his normal health. They had a conversation of the likelihood of the deceased being put under orders for Salonica.

Witness left him and five minutes afterwards, in consequence of what he heard, he went to the entrance of the Roodee, where he saw the deceased seated on a chair. Witness asked him what was the matter, to which he replied ‘I am passing into the great divide.’ Deceased appeared to be in a state of collapse and witness went to Major H.T. Jenkins, R.A.M.C., who came and remained with the deceased until he died. Captain E.D. Hayes, R.A.M.C., stated that as the result of an autopsy he found both the deceased’s lungs markedly tuberculous. Death was due to haemorrhage, following rupture of a branch of a pulmonary artery into the left lung, due to tubercular disease of the lungs. Deborah Blower, district nurse of Darwen at present staying at 34 Kingsley Road, Great Boughton, sister in law of deceased was also called and said deceased joined the Army on July 6th, 1896. He enjoyed very good health up to about four years ago.

When he arrived back from South Africa, where he suffered from pneumonia. Since then his health had only been fair and during the last twelve months he had gone terribly thin. She last saw him alive in May. The jury returned a verdict of death from ‘Natural causes’, as described in the medical evidence.

His wife must have decided to bring his body back to Worstead and he is now laid to rest in the North of West end of the churchyard.

‘Musical Box’ Writing a Wrong

The Battle of Amiens

8th August 1918

Photo 1 Whippet Tank

A Whippet Mk A seen in 1918

In June of 2009 I was lucky enough to accompany and assist the author Mark Adkin with a ten-day tour of the Western Front. Mark had asked to be taken to various sites from Ypres to Verdun so he could cover a number of actions that incorporated every major nation that fought there for a book he is writing about the Western Front. One of the areas visited related to the Tank V Tank action at Villers Bretonneux on 24th April 1918 and a lesser-known action that was fought by a British tank called Musical Box on 8th August 1918 at the Battle of Amiens.

I have been to those places a number of times since.
It is the second action that I want to write about because the information that is available to research is factually incorrect by one thing but it is, in my eyes, a major one. So much so that it was included in some of the most recent books about the battle, including Amiens 1918 by James McWilliams and R James Steel. This book is an excellent account of the battle but unfortunately followed the path of virtually every other author who has written about Musical Box. This article intends to right the wrong. However, before we go onto this, I would like to provide a brief overview as to what happened at Amiens.

Map 4

This map gives you an overview of the area where Arnold and his crew advanced and shows you the positions mentioned in the accounts used in this blog.

Amiens is generally considered the turning point for the Allies on the Western Front and was fought between the 8th and 11th August 1918. It was designed to counteract the German advances that had been made by the Germans after their massive offensive, which had started on 21st March 1918 that had almost pushed the BEF right to the outskirts of Amiens. This city was of strategic importance to the allies because of its railway network. Had the Germans been able to capture this supply route it would have seriously hampered the Allies ability to wage war.

There was an even bigger gamble for this offensive as Rawlinson was given virtually all of the Allied armour totalling to around 600 British and French tanks. This included 72 Whippet and 342 Mark V and V* tanks all of which were the newer variants of the tanks used in 1916 and 1917. Rawlinson also had 2,070 artillery pieces and 800 aircraft. A counter attack was planned that would involve American, Australian, British, Canadian and French divisions under the overall command of Haig who directed Henry Rawlinson to plan and prepare the offensive. It would also involve a ten-division attack on a ten-mile front from Morlancourt in the north to Hargicourt in the south. Surprise was essential as the majority of the fighting would be carried out by the Australians and the Canadians who were respected by both friend and foe alike for their determined ferocity in battle. Had the Germans got wind that these two elements were being concentrated in this area then it could have gone very differently on the day.

The German sector chosen was defended by 20,000 soldiers and they were outnumbered 6 to 1 by the attacking troops. The plan relied on the infantry and tanks acting in co-operation and there would be no preliminary bombardment with Rawlinson relying on a creeping barrage as the troops advanced.
The battle was a major success for the hard pressed Allies and by the end of the first day they had advanced nine miles into the German lines capturing well over 13,000 men and around 200 artillery pieces. It prompted Ludendorff to write of the battle that it,

‘…was the black day of the German Army in this war. … The 8th of August put the decline of that [German] fighting power beyond all doubt. … The war must be ended.’

That, simplified, is Amiens and this story is about one action in a battle fought on a huge scale that would see the Allies never really stopping right up to 11th November 1918 after it was fought.

As mentioned the battle included the use of tanks on a massive scale. One of the newer versions of this weapon was the Whippet Mark A which was faster than the earlier, heavy tanks and was intended as a cavalry style weapon. It only carried four machine guns and had a crew of three, one commander, a driver and a gunner meaning that the commander acted as the second gunner. It weighed 14.2 tons, had 5-14 mm armour was powered by 2 x 45hp Tylor JB Petrol Engines with 318 litres of fuel and had a maximum speed of just over 8 m.p.h., which was extremely fast for WWI standards!

C B Arnold Freiburg

Lieutenant Clement B. Arnold

Whippet Tank No 344, named ‘Musical Box’ was one of the 72 Whippets sent into action that day and was crewed by Lieutenant Clement B. Arnold, Private Christopher Ribbans (Gunner) and Private William J Carnie (Driver) of the 6th Battalion Tank Corps. It is Private Carnie that we must look to for the error. This is because virtually every account written has his name incorrectly spelt as Carney. We will come onto why this was so later on in the article.
The story starts with the 6th Battalion advancing in support of the Australians at 04.20hrs, zero hour, when Arnold and his crew advanced to the south side of the railway at Villers Bretonneux, crossing over the railway line and advanced past Australian infantry and Mark V tanks. Arnold takes up the story,

‘After 2000 yards in this direction I found myself to be the leading machine, owing to the others having become ditched, etc. To my immediate front I could see more Mark V tanks being followed very closely by Australian infantry. About this time we came under direct shellfire from a 4 field-gun field battery of which I could see the flashes between Abancourt and Bayonvillers. Two Mark V tanks, on my right front, were knocked out. I saw clouds of smoke coming out of these machines and the crews evacuated them. The infantry following the heavy machines were suffering casualties from this battery. I turned half-left and ran diagonally across the front of this battery at a distance of 600 yards. Both my guns were able to fire on the battery in spite of which they got off about eight rounds at me…’

Aus OH Bayonvillers Bty

An Australian OH map showing the batteries around Bayonvillers, some of which engaged Musical Box.

Arnold and his crew were engaged here by elements of the 27th Foot Artillery and he ran level with a belt of trees, using them as cover, then turned right and took out the guns from the rear, Arnold stating that the gunners, numbered around thirty, were engaged and,

‘Gunner Ribbans and I accounted for the whole lot.’

Map 2

A French IGN map showing Guillaucourt and the siding where Arnold stopped, noted here as ‘Arret’ e.g. stop!

After this initial action Arnold got back on track and caught up with the advancing tanks and infantry stopping at a railway siding NNW of Guillaucourt. Here he offered assistance to an Australian Lieutenant who was promptly shot in the shoulder. After briefly reporting what he had done to Major Rycroft (a Yeoman), who was OC B Coy 6/Tank Corps and Captain Strachan a Section Commander, he noticed that a number of tanks were bunching up so he opted to move onward proceeding on a course parallel with the railway.
He then came across forward elements of the 2/Dragoons that were deploying patrols into the area. One of two patrols came under fire and he assisted with suppressing fire killing three or four Germans.

Guillaucourt Station
Guillaucourt station and specifically the railway siding where Arnold and his crew stopped to confer with Australian infantry and his O.C.
The second patrol was seen to pursue a number of the enemy and this group were fired upon by some of these men who turned and stood their ground. One rider and horse were felled and the rest deployed to the right and dismounted. Arnold stated,
‘…where they came under fire from the enemy, who had now taken up a position on the railway bridge, and were firing over the parapet, inflicting one or two casualties. I ran the machine up until we had a clear view of the bridge and killed four of the enemy with one long burst, the other two running across the bridge and on down the opposite slope out of sight.’

Cavalry Action
The area where Arnold and his crew assisted cavalry.
Having assisted the cavalry, and having witnessed a burning train being pulled away three quarters of a mile away, he continued eastwards still running parallel with the railway. He then came across a small valley which he entered between Bayonvillers and Harbonnieres and came across hutments where the enemy were caught packing up. Arnold and Ribbans did not hesitate and opened fire on the poor hapless enemy. After this engagement Ribbans actually got out of the tank to count how many Germans they had just killed.

Christopher Ribbans
Gunner Christopher Ribbans soon after he joined the Machine Gun Corps.
Here I would like to add that of all the accounts I have read regaling Arnold’s one tank battle none is better, to my mind, than the one written by G. Murray Wilson in his book “Fighting Tanks – An account of The Royal Tank Corps in action 1916-1919”, published in 1929. It is across between a ‘Boy’s Own/Ripping Yarns’ story that is scathing of the enemy, where I would suggest that the wounds were still pretty raw eleven years onwards! Here is an extract from the book recounting what happened next.
‘There were probably about 600 Bosches, and yet Gunner Ribbans left the shelter of the Tank to do his little sum. “I turned left from the railway and cruised across country, where lines of enemy infantry could be seen retiring. We fired at these from 200 to 600 yards range. As our cruise lasted an hour, we inflicted much damage.” Arnold was now absolutely in the blue—an island entirely surrounded by undiluted Huns. “I did not see any more of our troops or machines after leaving the cavalry patrols.” Consequently he drew all the fire, from every kind of weapon that the harassed Bosches could bring to bear on “Musical Box,” which kept on playing her own devil’s tattoo in reply. The only thing to do was to keep on moving, like the stormy petrel in a typhoon.’
Stirring stuff indeed! Arnold continued onwards with his one tank battle and although he did not know it he had now become the forward element of the advance and was now well into enemy territory. By now the tank crew were also having to face problems from their own tank as they were carrying extra fuel on the roof of Musical Box. They had been ordered to do this prior to the attack, but this was against all standing orders and for the same reasons that they would find out later. Their initial problems were from the petrol fumes from spilt fuel that was sloshing all over the floor. This forced the men to breath through the mouth piece of their box respirators. They were also suffering from heat exhaustion as well as great fatigue, they had now been in action for ten hours, and finally wounds suffered from bullet splash. However, they continued onwards.
As the crew continued eastwards they noticed a large number of motor and horse transport moving in all directions and Arnold noticed the canopy of a truck heading their way. They then hid up and waited for the lorry to come over the rise of a bridge. Here Arnold shot the driver and the lorry crashed into a ditch on the right.

Photo 4 Bridge Ambush
‘I moved up out of sight and waited until he topped the bridge…’ This is the bridge where Arnold ambushed the lorry and is situated between Harbonnieres and Rosieres en Santerre.
By now Arnold and his crew were deep in enemy territory and we again visit Murray Wilson’s ripping yarn.
‘The railway was now quite close, and I could see long lines of men retiring along it at ranges of 400 to 500 yards. I fired at them and did much damage. Leaving these in a state of panic, ‘Musical Box ‘ looked round for more exciting quarry. Passing by a two horse canvassed wagon, I knocked that out, Gunner Ribbans (R.H. gun) did some good shooting on the motor and horse transport, whilst I fired many bursts at 600 to 800 yards on the transport blocking the roads on the left (L.H. gun).

IMG_2284

The area where Musical Box engaged retreating Germans along the railway.

I turned quarter-left to a small copse. On the way we came under the most intense rifle and machine-gun fire (bullet splash). The L.H. revolver port-cover was shot away. I withdrew the forward gun, locked the mounting and held the body of the gun against the hole.” This was pretty levelheaded after over ten hours’ delirious brainstorm. Arnold kept his balance, and if only the Fates had done the same it is conceivable that he would have overrun the German Army H.Q. His luck, however, ran out, like the petrol on the cab, and he describes it without bitterness: “Petrol was still running down the inside of the back door (of course ignited). As it was no longer possible to continue the action, I shouted to Driver Carney to turn about, when two heavy concussions closely followed each other and the cab burst into flames.’
Arnold would not have realised this at this point but he had come across a large force of Germans which the Australian Official History bears witness.
‘The troops into whom Arnold ran were transport of two regiments (18th Res. and 373rd) of the 225th Divn, together with its instructional school. Early on Aug. 8 this division, being driven out of its line by the Canadians south of the Luce, had ordered up this force, about 500 in all, to protect its headquarters in some sunken huts in the open country south-east of Harbonnieres. The force had just arrived there about 9 o’clock, says the history of the 217th RIR, “When the first tank appeared; it came up across country. A patrol of the instructional school under Res. Capt. Renner (O.C. school) with a light machinegun took it under fire and advanced within a few yards of it. A few shots with armour-piercing ammunition and the tank stopped and began to burn. Three men left it. A pigeon set free at the last moment was shot down but had no message on it. Prisoners and pigeon . . . were sent to D.H.Q.’

E1jo09f

This is supposed to show the burnt out remains of Musical Box pictured the day after its demise with Australian soldiers of the 15th Brigade and some German prisoners.

Arnold’s campaign was at an end and the demise of Musical Box was swift. All three of the crew managed to evacuate from the doomed tank but the driver was shot in the stomach and died. Arnold and Ribbans narrowly escaped being bayoneted and bludgeoned to death when a group of angry Germans reached them but an officer intervened and they were eventually marched away into captivity.
The 6th Battalion Tank Corps reported Musical Box missing although there are reports of it being found the next day. The story of Arnold and his crew was not told until 1919 when both of the surviving crew were repatriated, both meeting up with each other in a camp near Canterbury. Arnold wrote a detailed account, as was dictated by the War Office for all officers to account for their capture, and the tale became one of legend.
And this is also how Carnie’s name became to be miss-spelt and how virtually all the accounts I have read have assumed that this is the correct spelling of his surname. If you search for the surname Carney on the CWGC website it will not come back with any matches for a man serving in the 6th Tank Corps and I have seen instances where people have assumed he must have survived. However, if you search under the correct spelling it comes back with a direct match.

BxzkmINCMAAMfTg

William James Carnie

William James Carnie was born in 1897 and was the son of William and Mary Carnie of Kintore in Scotland. Carnie has no known grave and is now commemorated on the Vis en Artois Memorial as well as being listed on the Kintore war memorial. Both he and Ribbans are also often reported as being Sergeants but I have not seen any evidence of this on any military documents, including Arnold’s report.
Arnold was awarded the DSO and Ribbans the DCM, Carnie received no such award even though Arnold had stated in his report,
‘The conduct of Gunner Ribbans and Driver Carney was beyond all praise; throughout, Driver Carney drove from Villers-Bretonneux (4.20 P.M. 18th till 3.30 P.M. 19th).’
Therefore, when you guide or visit this area, please spare a thought for William Carnie who still lies out on the battlefield of Amiens.
Sources used:
Official History of Australia in the War of 1914–1918 – Volume VI CHAPTER XIV “DER SCHWARZE TAG”.
From the book “Fighting Tanks – An account of The Royal Tank Corps in action 1916-1919”, published in 1929 and edited by G. Murray Wilson.
Amiens 1918 by James McWilliams and R James Steel.
To Win a War by John Terraine.

A Forgotten Hero

Corporal 12345 Armine Davison (Military Medal)

11th Sherwood Foresters (Nottinghamshire & Derbyshire Regiment)

photo

Armine Davision, this picture is shown on the montage in Worstead Church

Armine Davison was born in 1894 and was the son of Austin and Florence Davison who lived on Church Plain in Worsetad. Armine was a gardener like his Grandfather James Davison and his Uncle George both of whom were the retired and current Head Gardener for the Westwick Estate. Armine’s father is listed as being a shopkeeper and overseer in the 1912 UK City and County Directory and went on to become a parish councillor after WWI.

Armine moved away to become a gardener at Belton and in August 1914 he joined up with his friends Harold Porter and William Thornley. All took consecutive service numbers in the Nottinghamshire & Derbyshire Regiment. William took 12344, Armine took 12345 and Harold took 12346. They all initially joined the 9th Battalion. 

This battalion was formed at Derby in August 1914 and became part of the 33rd Brigade in the 11th (Northern) Division. They sailed from Liverpool in early July 1915 and landed at Gallipoli at Suvla Bay on 7th August 1915, Armine, Harold and William all landing on that date. There they remained until Gallipoli was evacuated in December 1915 where they then sailed first for Imbros in Greece before going onto Egypt in February 1916.

However, this time took its toll, Armine contracted enteric fever and was sent back to England. When he returned to active duty he did so with the 11th Battalion Sherwood Foresters who were part of the 70th Brigade of the 23rd Division. It was with this battalion that he was awarded a Military Medal and Armine is the only man to be awarded a gallantry medal and to make the ultimate sacrifice who is listed on the war memorial in Worstead church.

This was awarded for volunteering to lead a daylight patrol 300 yards into no-man’s land where he brought back vital information as to the ground in front of the enemy and their positions during the Battle of the Menin Road at 3rd Ypres where the 11th Battalion saw action between the 20th September and 1st October 1917. This was gazetted on 12th December 1917.

MM Armine

Armine’s citation for his Military Medal

On the 23rd October 1917, orders were received to prepare to move to an unknown destination, and within days the lengthy move by rail to Italy began. So why Italy?

Italy had sided with the Allies and had been fighting the Austro-Hungarian Empire on its own. As the campaign progressed the Germans gave assistance to the Austro-Hungarians and in 1917 they launched a spectacular offensive that almost destroyed the Italians.
On the 24th October 9 Austrian and 6 German divisions attacked after the Italians had been pounded by a preliminary bombardment of high explosive, gas and smoke. Using the same type of tactics as would be seen in France and Belgium the offensive smashed the 2nd Italian Army and they were pushed back 16 miles before the front could be stabilised enough to stop the advance.

By then failed counter attacks and the complete surprise had led to the Italians losing some 300,000 casualties with virtually all their artillery lost. It so shocked the Allies that the Italians received assurances of increased military support from Allied governments. And so six French and five British divisions were sent to bolster the beleaguered Italians. The Italians were also lucky that the Austro-Hungarian/German could not launch any fresh offensives as they had lost heavily in the advance and the Italians also withdrew to the River Piave where the line was held.

And so the 23rd Division, which was inspected by the Commander in Chief Sir Douglas Haig at Leulinghem on 31st October, entrained. On the 10th November 1917 when the Italian line finally settled, the 70th Brigade moved from Wizernes then through the Rhone valley and on through Marseille, Cannes and Nice, eventually entering Italy at Mantola where on the 16th November they were billeted at Ceresa. On 16th November 1917, their concentration was completed between Mantua and Marcaria. But, the travelling did not stop and the men would now march to the front.

They covered a staggering 90 miles in 90 days. On the 3rd December, the 23rd Division took over a section of front line on the Mountain of Montello, relieving the 70th Italian Division.

Here they consolidated and repaired the Italian front line trenches and came under fire from Austrian artillery. They moved out of the line on the 30th November. Following the route of the 70th Brigade we find them moving in and out of the line between December and January and February saw them in billets at Pedervia and then in March another move was made whereby they moved from Pedervia to Granezza.

On the 28th of March they relieved the Italian 28th Regiment. It was noted that was a very quiet sector and patrols were mounted. Effectively from then on the 23rd Division spent time in and out of the line. However, all this would change in June at the Battle of the Piave River which would be code-named Operation Radetzky.

Sketch map Asiago[1]

The order of battle for the 11th Battalion for Asiago

On the night of the 14th and 15th June 1918 on the Asiago plateau was damp, with a thick mist forming in hollows and valleys. At 3 a.m. a furious artillery barrage was poured onto the Allied lines and this also fell on their command and control, supply dumps and road junctions. This bombardment lasted for over four hours, and was followed up with a massive infantry attack who had assembled in areas just forward of their own wire. The Austrians, who commenced their infantry assault at 05:30hrs, chose to attack the French and British sectors who were positioned around Granezza and Carriola and the edge of an escarpment.

The 23rd Division had to protect a front of about 18,000 feet and the 68th and 70th Brigades were in the front line with the 69th Brigade in reserve. The situation facing the division has been described as complicated. It was holding the line in preparation for an Allied offensive that was set to be implemented on the 17th June. However, all front-line troops were under orders to prepare for an enemy bombardment and were to only have their front-line positions lightly manned. They were further hampered by the fact that all the battalions were seriously under-strength because of illness, leave or the fact that men were attending courses. The war diary would note that the Austrians attacked with four divisions, identified as the 6th, 58th, 38th, and 16th, against five British battalions and they managed to breach the British lines before being repulsed where they suffered horrendous losses in their retreat. The 11/Sherwood Foresters were holding the line at a place called the San Sisto Ridge and had a frontage of about 3,230 feet. As well as information provided by the war diary we also have a regimental history published in 1919 entitled ‘The Men From Greenwood’ written by Percy Fryer.

The Battalion had gone into the line on the 11th June and like all of the battalions it was seriously under-strength. The war diary lists that only 19 out of 34 officers were in the line, while the two forward companies, listed as ‘A’ and ‘D’ Coys, each had less than a hundred other ranks to man around 3,000 feet of trench. This was difficult in itself as the regimental history describes the ridge that they now defended as 1000 yards long, 300 yards broad and 200 feet high and joined the British to the French lines.

WD.jpg

The main war diary entry for the battalion for 15th June 1918

‘D’ Company was commanded by Captain Fred Handel Frith and ‘A’ Company by Captain Edward Harold Brittain who was the adored elder brother of Vera Brittain. However, the regimental history notes that both companies were specifically under the command of 2nd Lieutenant Coleman Leonard James Maurice Sallmeyer and 2nd Lieutenant Thomas Cheetham respectively at the time of the attack. Both of the forward companies were also supported by two well sited machine guns that had been placed 100 yards covering two advances to two shallow valleys as well as four other machine guns were also sited 20 yards forward of the woodland that also occupied the ridge.

‘B’ and ‘C’ Companies were in support with B holding the Allied second line next to a French battalion on their right and the 8/York & Lancs to their left. It would be B Company’s job to counter attack if the need arose. ‘C’ Coy was positioned in four strong-points situated on top of the ridge and Armine was part of ‘C’ Coy. It is also noted that another platoon had to provide a night piquet and cover an outpost.

When the artillery barrage opened ‘A’ Coy sustained severe casualties and was trying to hold nearly 2,600 feet of the line with only fifty rifles and large gaps between them and ‘C’ Coy allowed the a group of enemy described as 200 in strength with 2 machine guns to get through the British lines.

Charles_Edward_Hudson.jpg

The 11/Sherwood Forester’s Commanding Officer, Lieutenant Colonel Charles Edward Hudson, DSO, MC

They advanced towards ‘C’ Coy as ‘A’ and ‘D’ Coys managed to hold the line with the French. This group managed to bring fire down on the battalion’s HQ and the country beyond.

The 11/Sherwood Forester’s Commanding Officer, Lieutenant Colonel Charles Edward Hudson, DSO, MC, now took the initiative himself and utilised his HQ Coy into action whilst sending another officer to get reinforcements from B Coy. Hudson’s prompt action beat back the attackers who retreated back to the front-line. Furious efforts to stop the advance utilising reinforcements from other British and Italian units effectively plugged gaps in the line and on the flanks. Once this was done Hudson then led a group of men to the front-line where for this overall action he was awarded the Victoria Cross, his citation stating,

For most conspicuous bravery and devotion to duty when his battalion was holding the right front sector during an attack on the British front. The shelling had been very heavy on the right, the trench destroyed, and considerable casualties had occurred, and all the officers on the spot had been killed or wounded. This enabled the enemy to penetrate our front line. The enemy pushed their advance as far as the support line which was the key to our right flank. The situation demanded immediate action.Lieutenant Colonel Hudson recognising its gravity at once collected various headquarter details, such as orderlies, servants, runners, etc., and together with some Allies, personally led them up the hill. Driving the enemy down the hill towards our front line, he again led a party of about five up the trench, where there were about 200 enemy, in order to attack them from the flank. He then with two men got out of the trench and rushed the position, shouting to the enemy to surrender, some of whom did. He was then severely wounded by a bomb that exploded on his foot. Although in great pain, he gave directions for the counter-attack to be continued and this was done successfully, about 100 prisoners and six machine guns being taken.Without doubt the high courage and determination displayed by Lieutenant Colonel Hudson saved a serious situation and had it not been for his quick determination in organising the counter-attack a large number of the enemy would have dribbled through, and a counter-attack on a larger scale would have been necessary to restore the situation

London Gazette dated 11th July 1918

Hudson was only 26 at the time.

Overall the 23rd Division lost a little ground on its flanks but actions such as Hudson’s recovered the lost ground during the day. The overall Allied line suffered a breach of 1.5 miles towards the escarpment but the Austrians were checked although it took another five days of terrible fighting before the Austrians were beaten. Both French and British accounts mention massed attacks made by the Austrians that led to them suffering terrible casualties, which amounted to almost 50,000 men from the 11th Austrian Army, during the period 14th-25th June 1918 these all for minimal Allied casualties. For example the British casualties amounted to just fewer than 1,500 of all ranks, killed, wounded and missing.

The war diary for the 11/Sherwood Foresters reported at least 200 Austrian dead lying in front of their lines after the battle. Operation Radetzky had failed to push the Allies back and the Austrians never attacked again.

Armine Davison and Grave

Armine Davison and his original grave marker at Granezza

Among the British dead was Armine and Edward Brittain, the brother of Vera Brittain the writer who written about the women’s experience of WWI, who had apparently been the only unwounded officer in his company. He is reported as appearing on the scene having returned from consulting with the French and rapidly organizing a counter-attack group, which included some French soldiers. He led this attack, which forced the Austrians back.

Some jumped out of the trench and ran back towards others coming through the wire. These enemy troops went to ground and opened fire on the Foresters, as did machine-gunners and riflemen on both sides of the wire. Brittain re-organized the defence of the trench, forming a flank with what troops he had available. He apparently paused to observe the enemy, and was shot by a sniper as he did so.

64655690_1514039635

Edward Brittain

Vera Brittain was haunted by her brother’s death for the rest of her life and after the war she wrote the book ‘Testament of Youth’. She was the mother of former Labour cabinet minister Baroness Shirley Williams. Her ashes were taken to Italy by her daughter and sprinkled on Edward’s grave. Armine was also among the dead and overall the 11/Sherwood Foresters lost 4 officers killed or wounded with a further 52 other ranks killed, wounded or missing. Armine was probably killed when the Austrians breached the line and attacked the positions held by ‘C’ Company.

IMAG0025

Armine’s grave seen in the present (Photo from Battle Honours Tours)

After the terrible fighting in June the line again settled to one of training and of going in and out of the front line. In September 1918 the 23rd Division was moved from the Asiago Plateau, and was billeted in an area northwest of Vicenza before moving by rail to Treviso. It was part of a wider movement with the British Army taking over a wide front on the banks of the River Piave, down stream from its former positions on the Montello. The Piave here is a mighty river indeed: 800 yards or more wide, very fast-flowing in numerous deep channels. A feature facing the British was a flat, narrow, four mile-long island of Papadopoli.

This move was part of a broad plan by the Italian Commander-in-Chief General Diaz to make a decisive break through across the Piave, to separate the Austrian forces on this front from those in the Trentino. If a major advance could be secured in this area then the enemy’s rail routes for supply would be cut and they would be forced to withdraw their troops from Italian soil. The attack commenced on the 23rd October 1918 and became known as the Battle of Vittorio Veneto. This battle efectively destroyed the Austrians who lost a staggering 300,000 men in the offensive and they sued for peace on the 4th November 1918.

Armine Davison now lies in Plot 1, Row B, Grave 4 in Granezza British Cemetery and is buried in the same row as Edward Brittain and the other men who were killed in action on the 15th June and who served in the 11/Sherwood Foresters. Harold Porter and William Thornley both survived the war.

Armines Parents Grave.jpg

Armine’s parent’s grave which records the loss of their son

As a footnote when Armine’s mother passed away in 1948 his passing was also recorded on her gravestone noting at the bottom,

Also Their Son
Corporal Armine Davison MM
11th Sherwood Foresters
Killed in Action Granezza Italy
15th June 1918 Aged 25 Years

Norfolk War Memorials

Crostwick War Memorial

dsc_0002

Crostwick war memorial which is hidden away off the B1150 Norwich-North Walsham road

If you drive from Norwich to Coltishall on the B1150 you will pass through Crostwick. Hidden away on the right between Rackheath Road and the White Horse Pub you will find the Crostwick War Memorial. But blink and you’ll miss it! It is hidden away off the road and the only marker you have is a public footpath sign.

There are six men recorded on the memorial that died in WW1. Sadly there is only one photograph that I have found of these men but we can use other documents to record what happened to them.

Frederick James Goffin was born in Salhouse and enlisted in Norwich. He became Driver T4/045054 in the Army Service Corps. But by 1918 he was serving as Private 31232 with the 12th (Norfolk Yeomanry) Battalion Norfolk Regiment. This battalion had started out as 1/1st Norfolk Yeomanry and had initially served in Gallipoli and Egypt. But on 7th February 1917 they were converted to infantry and on 1st May 1918 they embarked at Alexandria for Marseilles where they landed on 7th May. By 21st June 1918 they were serving with the  94th Brigade in the 31st Division.

hyde-park-corner

Hyde Park Corner seen in Grid 19 from a trench map

By September 1918 the battalion was positioned around Hyde Park Corner situated to the west of Ploegsteert Wood. The war diary records that were in and out of trenches around this area with their Battalion HQ positioned at Grande Munque Farm. His death is not recorded but the war diary records that they were in trenches between 8th to the 13th September 1918. During that time the battalion lost 2 officers and 4 other ranks. Frederick was one of three killed on 11th September 1918 and is now laid to rest in Grave VIII. O. 6. in Strand Military Cemetery where the majority of the casualties from that time are buried. He was aged 42 when he died and was the son of John and Mary Goffin.

DSC_0057

Frederick James Goffin’s grave in Strand Military Cemetery near Ploegsteert

Henry John Holmes enlisted in Norwich and became Private 3435 in the Norfolk Regiment. But he was sent to the Northumberland Fusiliers and given the service number of 4/9310 which denoted he was now serving in the 1/4th Battalion which was a TF unit. TF units were standardised to conform to the regulars in 1916 and he was given the service number of 204045 when that happened.

mwsnap624

The order of battle for the 1/4th Battalion on 24th April 1917

In April 1915 they landed in France became part of the 149th Brigade in the 50th (Northumbrian) Division. Henry was a 1916/1917 entrant to the war and he died of wounds on 24th April 1917 when during the second phase of the Battle of Arras the 149th Brigade assisted in the attack to the south of the Cojeul River, a strong counter attack forced the division back. He was 33 when he died and was the son of Walter Henry Holmes of Crostwick Bridge and is commemorated on the Arras Memorial.

Corporal 13969 Robert James Parfitt enlisted at Wisbech and joined the 8th Battalion Suffolk Regiment. He landed in France on 25th July 1915 and had won the Military Medal during the fighting on the Somme, his medal was listed in the London Gazette on 21st December 1916.

Robert was killed in action when the 8th Battalion took part on the opening phase ofthe 3rd Battle of Ypres. Robert was part of c Company which advanced up the menin Road from Sanctuary Wood. Once they reached an objective called Jap Avenue they came under heavy fire from Glencourse Wood and Inverness Copse and any further advance was stopped with the company consolidating shell-holes. They came under fire from an enemy strong-point which was partially captured, the company silencing one machine gun and capturing twenty prisoners. But the position took heavy fire and they had to retire back to Jap Avenue. Robert was one of thirteen men killed in this advance.

3rd Ypres 31 Jul 17

The order of battle for 31st July 1918 involving the 8th Division. The menin Road, Glencourse Wood and Inverness Copse can be seen centrally and to the east


He is listed as the Father of Miss Dora Parfitt of 41 Belvoir Street in Norwich and has no known grave, being commemorated on the Menin Gate.


Image result for john dossie patteson

John Dossie Patteson

John Dossie Patteson was commissioned into the 5th (Princess Charlotte of Wales’s) Dragoon Guards on 9th April, 1910. The 5th Dragoon Guards landed in France of 16th August 1914.

On 13th October 1914 the Cavalry Corps were ordered to move to protect the northern flank of III Corps and met with opposition and requested infantry assistance. They were unable to turn the flank around Meteren. A Corps attack, the first of the war, along a 5 mile front between La Couronne to Fontaine Houck, went in. During this attack Mont Noir was occupied by the Cavalry Corps and in this fighting John was killed in action.

He was 25 and is laid to rest in Grave VI. F. 5. in Pont Du Hem Military Cemetery at La Gorgue. He was the son of Col. H. T. S. Patteson of Beeston Hall.

dsc_0001

A closer view of the memorial listing

Corporal 16327 Walter James Sandy had initially served in the 1st Battalion Norfolk Regiment as 7704 and had landed in France as a draft on 12th May 1915. He had transferred to the Machine Gun Corps and was serving with the 5th Battalion when he was killed in action on 2nd September 1918.

5 MGC

The after action report for 5 MGC 2nd September 1918

Aged 22 he was the son of William and Rose Sandy of Spixworth. He has no grave and is commemorated on the Vis-en-Artois Memorial.

5 MGC No 1

The 2nd part of the after action report for 5 MGC

Private 23932 Frederick Thaxton was one of lost 6 officers and 128 other ranks killed, wounded or missing when the 7th Battalion Norfolk Regiment assaulted and captured a German trench known as Skyline Trench, it also had the name of 6th Avenue.

At 10.30 p.m. the 7/Norfolks advanced with the 9/Essex on their left and the Australian 50th Battalion on their right marking the line between the Australian and British divisions. The Norfolks advanced with “A” and “D” Companies leading and “B” and “C” Companies behind them. The advance carried forward under the cover of a barrage and because of this the Norfolks managed to get into the German trench unopposed and caught the enemy by surprise capturing 20 out of the 30 Germans they encountered there. They then cleared out the dug-outs in the trench and consolidated their gains. They made contact with both the Essex and the Australians of which the Australian Official History (OH) notes

‘An hour later arrived news that the left company at 81 was in touch with the Norfolk Regiment in Skyline Trench.’

IMG_8300

6th Avenue, AKA Skyline Trench, as it is today. I am stood on what would have been known as Point 81

Frederick was aged 26 and was the son of S. Arthur Thaxton and the husband of Kate Thaxton of Crostwick. He has no known grave and is commemorated on the Thiepval Memorial.


Tank Week

Norwich Tank Week

1st – 5th April 1918

Nofolk Constabulary0012
News of tanks being used on a massive scale at Cambrai increased public desire to see the charismatic new war machine, thereby creating a fundraising opportunity for the National War Savings Committee. Charged with raising money for the war, the Committee initiated a ‘Tank Bank’ campaign which, though carried out at home, would become one of the most successful tank operations of the entire war.

Tank Week Report 3

A notice in the Norwich Evening News letting people know that the tank would arrive on Monday

The first Tank Bank was established shortly after the Battle of Cambrai. A battered tank named ‘Egbert’ was recovered from the battlefield, shipped to London and installed in Trafalgar Square. People were then invited to buy war bonds and certificates, and to queue up outside this unlikely ‘new god’ so that their bonds could be specially stamped by young women seated inside the tank.

Tank Week Report

A report on the third day of Tank Week, 3rd April 1918, detailing donations made by local schools

Having proved successful in Trafalgar Square, the campaign was soon extended elsewhere. A collection of tanks was brought back from France and toured around the country, under the guidance of the National War Savings Committee’s ‘tank organisers’, spending a week at a time in scores of cities and towns. In total, there were six tanks that were used to tour the country. They were called Julian, Old Bill, Nelson, Drake, Egbert and Iron Ration. As would be expected, Nelson was sent to Norfolk.

Tank Bank Week April 1918

Nelson being escorted to the Guild Hall by men of the Norfolk Regiment

As in London, politicians, churchmen, war heroes and theatrical celebrities were invited to perform and address the crowds from the top of the tank. A competitive league was established to see which town could raise most per head of population, and the atmosphere that built up around the visiting tanks at the end of their week-long visit was likened to a pre-war football cup final.

Tank Week Report 2

An advertisement in the Eastern Daily Press noting that the tank would be leaving on Friday night

The Tank Banks were reported to have raised prodigious sums of money as they travelled from one place to the next. Large employers invested through the tanks, but they were also said to be particularly effective in attracting investment from the working class and people without bank accounts.

Lucy Bignold Tank Bank Week

Mrs Charlotte Lucy Bignold stood at the front giving a speech on top of Nelson

But fundraising was not their only role. The Committee’s tanks were taken to exert their ‘moral effect’ in areas troubled by political militancy. For instance, in South Wales, the Tank Banks were used not just to sell war bonds, but to stir up a ‘tank patriotism’ that could be turned against miners who opposed the war and were taking their lead from the peace proposals made by Leon Trotsky and Vladimir Lenin following the Bolshevik takeover of Russia in November 1917.
From Monday, 1 April 1918, ‘Norwich Tank Week’ was held in an effort to raise war bonds, with Nelson displayed outside the Guildhall. The EDP reported that the most memorable part of the week was arranged by the newly formed National Union of Women Workers.

Tank Week Report 4

An advertisement in the Norwich Evening News encouraging those that have purchased war bonds to purchase more

‘There were units of munition girls in uniform, including a large party from Norwich Components and parties also representing women railway workers, Carrow Works, the Women’s Land Army, the Women’s Co-Operative Guild, Milk Girls and women and girls employed in printing and allied trades.’
The article revealed that the female workers of J. & J. Colman alone had raised £1,219 4s 6d. The final day of Tank Week saw the EDP report that,
‘The success of the week is already assured; but we are not content with a measure of success below a million; and we trust that today’s final effort will achieve it.’

img072a

Civil dignitaries, including the Chief Constable of Norwich City Police, seen stood central wearing the helmet

And meet it they did. A final ceremony was held and further funds were donated, including two cheques from Norwich City Police whereby the Chief Constable, John Henry Dain, presented the Lord Mayor, Richard Jewson, with a total of £50,000 raised through private donations from police officers and their families.
In total a staggering £1,057,382 was raised for the war effort.